
 Share
Share
 Print
Print
|
|
|
|
|


Adding Users via Library Group Authorization
In order to add users to a Library Authorization Group, go to Library / Explorer / Library Authorization Group Explorer:
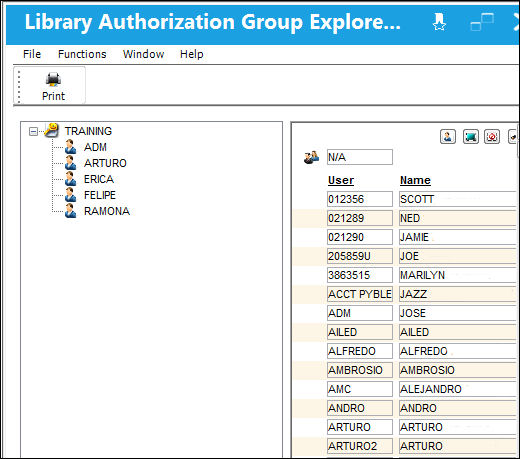
On the left hand side of the screen, all existing Library Authorization Groups are displayed with the users that are currently assigned to the group.
On the right hand side of the screen all users are displayed and can be assigned to one or several groups.
Assigning users to a group is done via drag-and-drop:
- Select an Authorization Group by clicking on the group name. The group name will be highlighted in blue.
- Select the user(s) that the user wants to add to the Authorization Group by simply clicking on their login code displayed in the right half on the screen. In the following example, the users Adam and Alberto will be added to the Authorization Group QA.
Click and Drag the User  button to a Group.
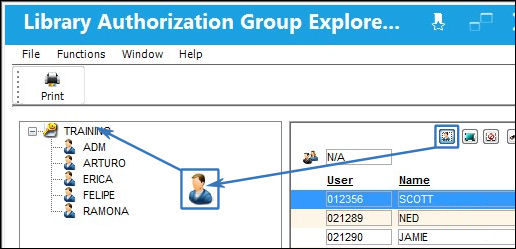
Make sure that the Employee icon (illustrated above) is placed directly over the Name of the Authorization Group (QA in the above example).
1. A confirmation window will appear:
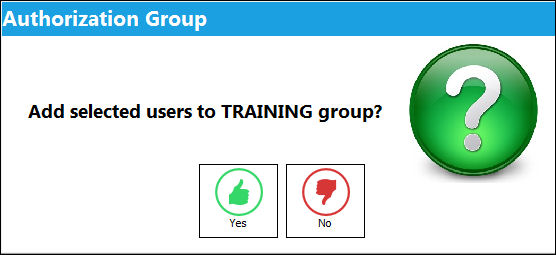
2. After confirming the message, the users will be added to the selected Authorization Group.
To remove a user from an Authorization Group, right click on the user and then select ‘Remove User’.
Share
Print
|
©1997-2026 Trax USA Corp. All rights reserved. This manual may not be copied, photocopied, reproduced, translated, or converted to any electronic or machine-readable form, in whole or in part, without prior written approval from Trax USA Corp. |
 |