
 Share
Share
 Print
Print
|
|
|
|
|


Applying Shift Patterns
In order to connect Shift Patterns to the Employee schedules several steps must be taken.
Before creating Shift Patterns users must first create Weekly Schedules. From the Daily Shift Pattern window, hourly shifts can be created and/or edited. For more information refer to the Daily Shift Pattern.
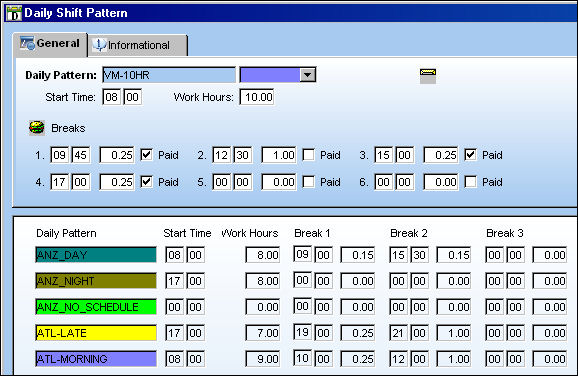
Weekly Pattern:
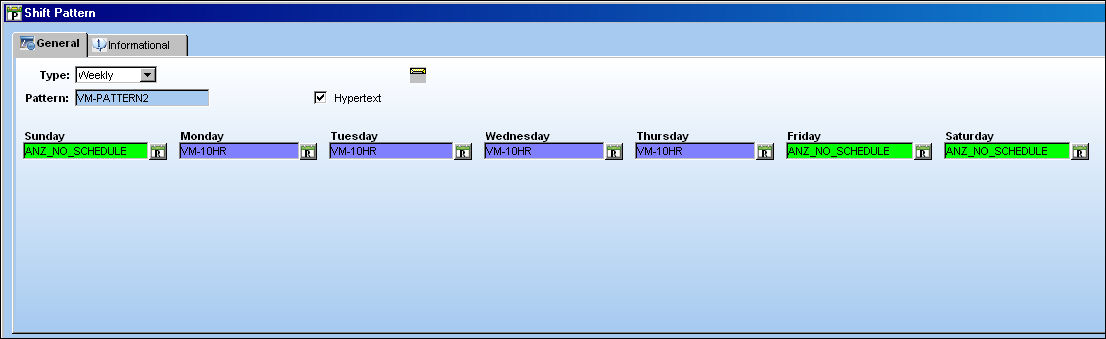
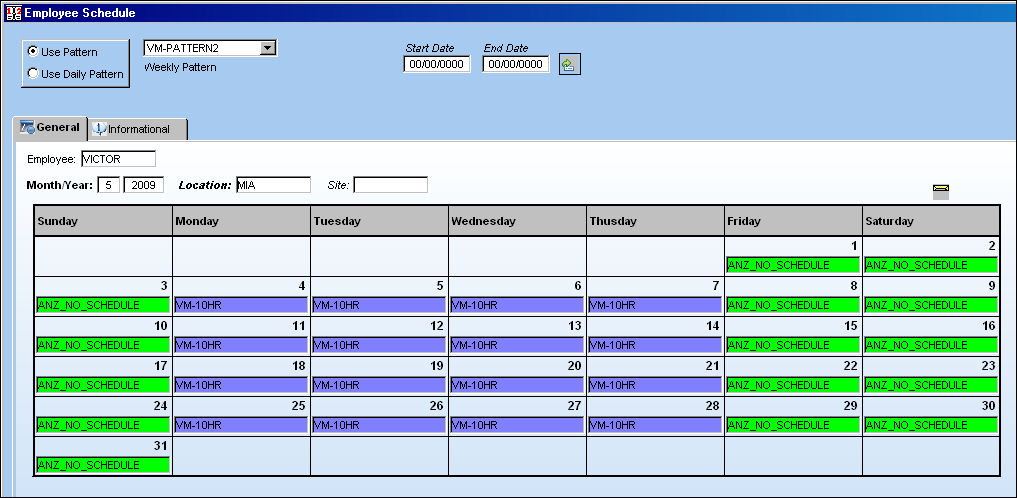
From the Shift Pattern window create a new (or select an existing) pattern. For this example, the pattern will consist of a Weekly Schedule with four days on shift and three days off.
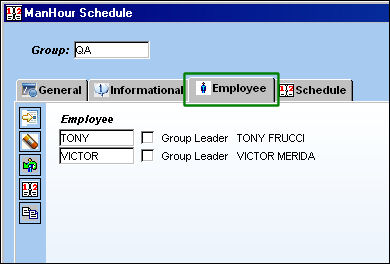
Go to the Man Hour Schedule window and choose a group. From the Employee tab enter an employee then select the Schedule  button.
In the Employee Schedule window select the New  button to create a new month then enter the previously created pattern. Select the new month then press the Generate button.
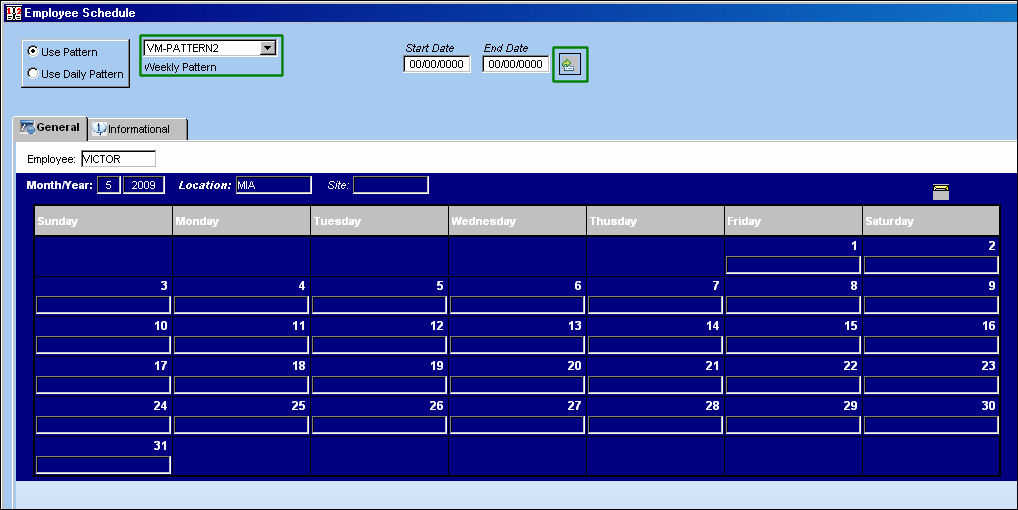
The Weekly Pattern will appear with each day of the week synchronized regardless of the Start and End Date.
Daily Pattern:
If a Daily Schedule is generated the results will be synchronized by the date number (1, 2, 3, etc.) instead of the day of the week (Sun, Mon, etc.).
For instance, from the Shift Pattern window create a new (or select an existing) pattern. For this example, the pattern will consist of a Daily Schedule with three days on shift and one days off.
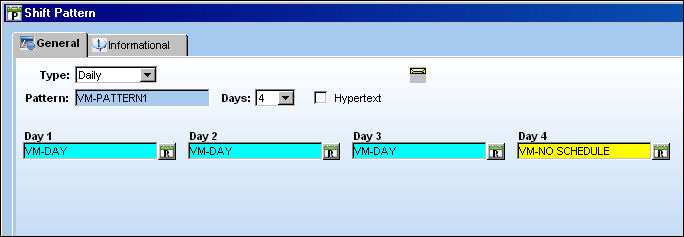
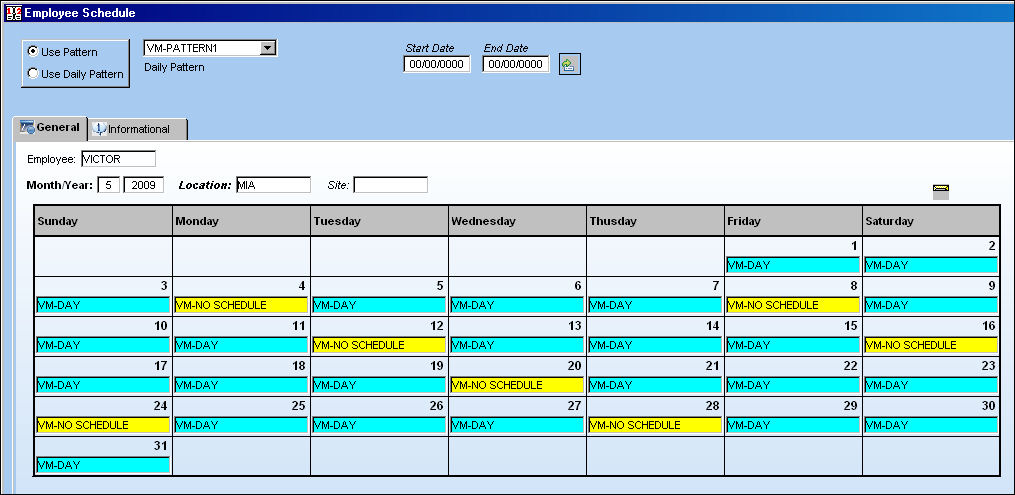
With the Start Date field empty, the Daily Pattern will appear with each of the days synchronized starting on the first day of the month. Because the Start and End Dates are null, the Daily Pattern will begin on the first of the month.
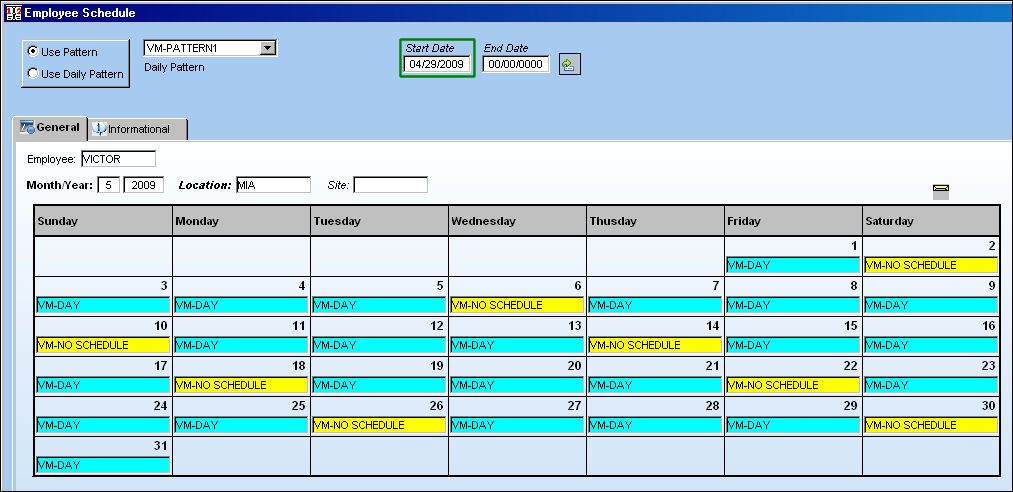
Unlike the Weekly Pattern, when a Start Date is added, the Daily Pattern will be adjusted to begin on the entered date. For example, notice how the pattern is reflected on the calendar when a Start Date is entered 2 days before the 1st of the month:
Monthly Pattern:
When a Monthly Pattern is generated the results will also be synchronized by the Day number (1, 2, 3, etc.) instead of the day of the week (Sun, Mon, etc.).
For instance, from the Shift Pattern window create a new (or select an existing) pattern. For this example, the pattern will consist of a Monthly Schedule with five days on shift and two days off.
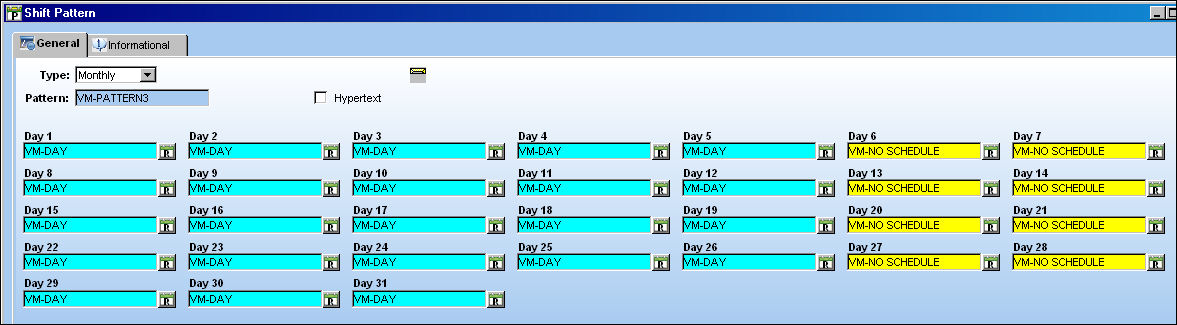
When the Monthly Pattern is generated via the Employee Schedule window, with the Start Date field empty the Monthly Pattern appears with each of the days synchronized starting on the first day of the month. Because the Start and End Dates are null, the Monthly Pattern will begin on the first of the month.
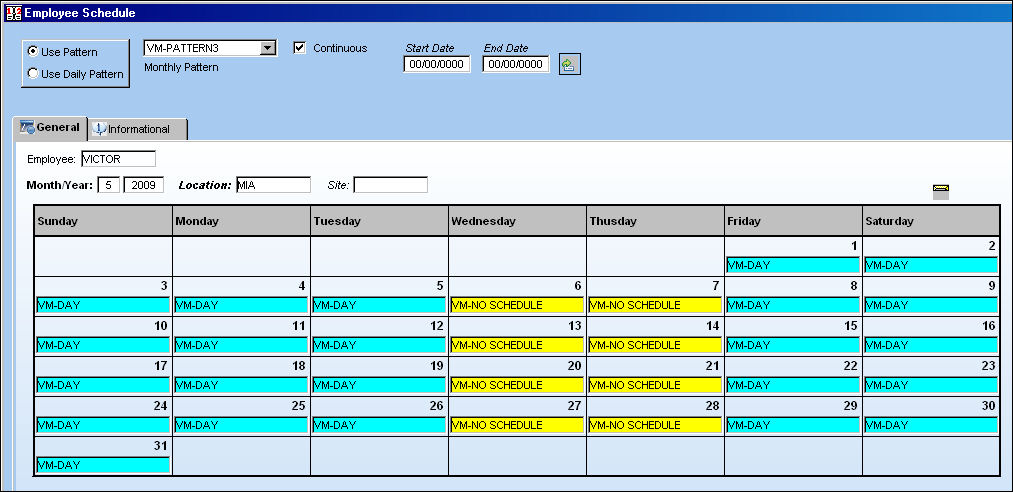
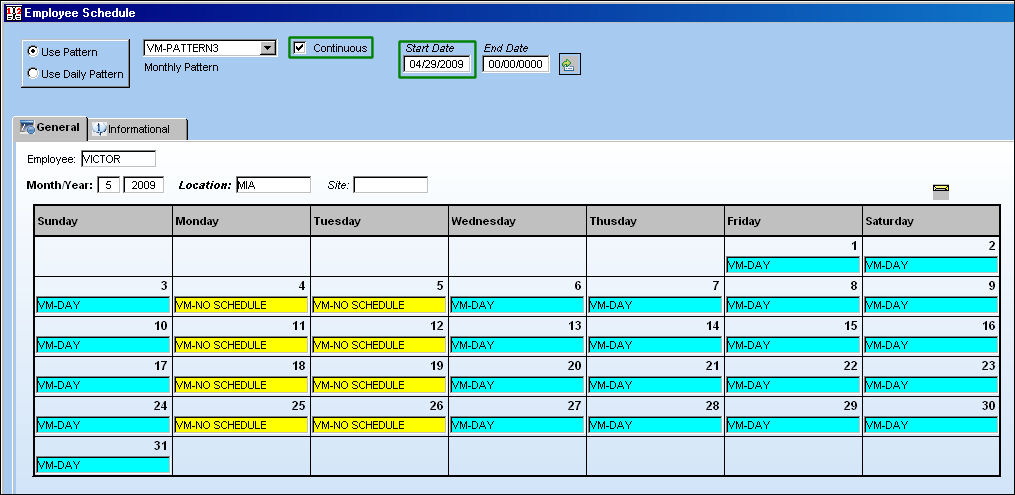
Unlike the Weekly Pattern, when a Start Date is added the Monthly Pattern will be adjusted to begin on the entered date.
When a Start Date is entered for a Monthly Pattern the Continuous checkbox must be selected to generate properly.
For example, notice how the pattern is reflected on the calendar when a Start Date is entered 2 days before the 1st of the month:
Recurrent Pattern:
When a Recurrent Pattern is generated the results will be synchronized by the days of the week (Sun, Mon, etc.).
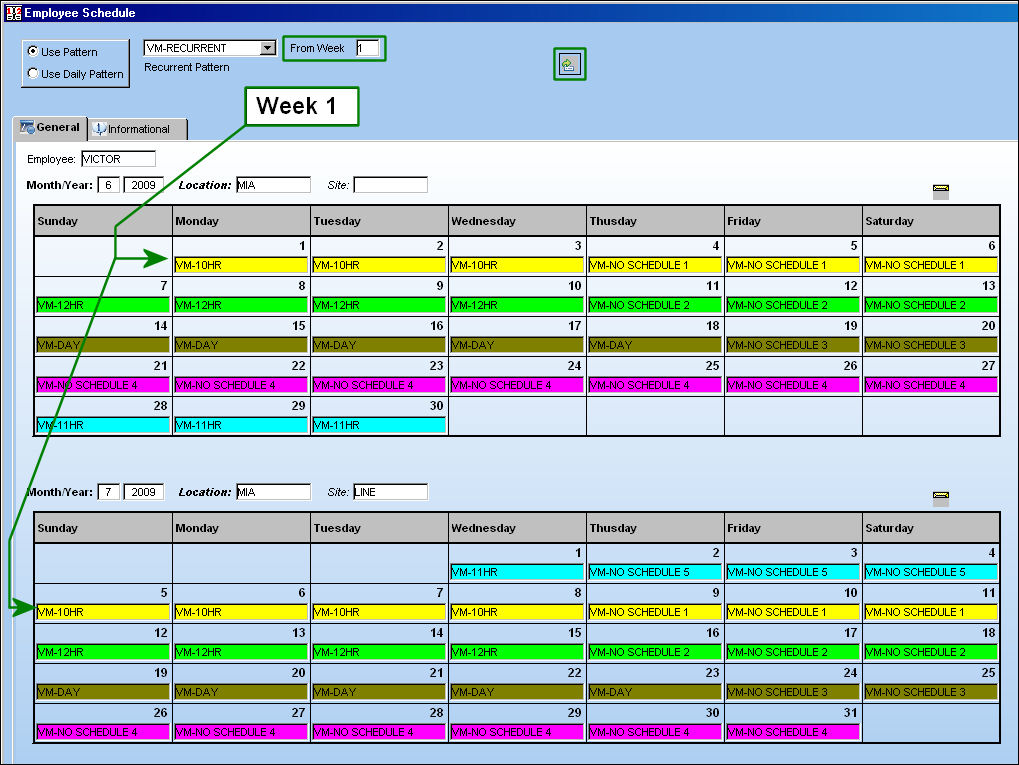
For instance, from the Shift Pattern window create a new (or select an existing) recurrent pattern. For this example, the pattern will consist of a 5 week cycle with each week representing a different work schedule.
In order to create multiple weeks for a Recurrent Pattern, each new week must have the same pattern name with a different week number.
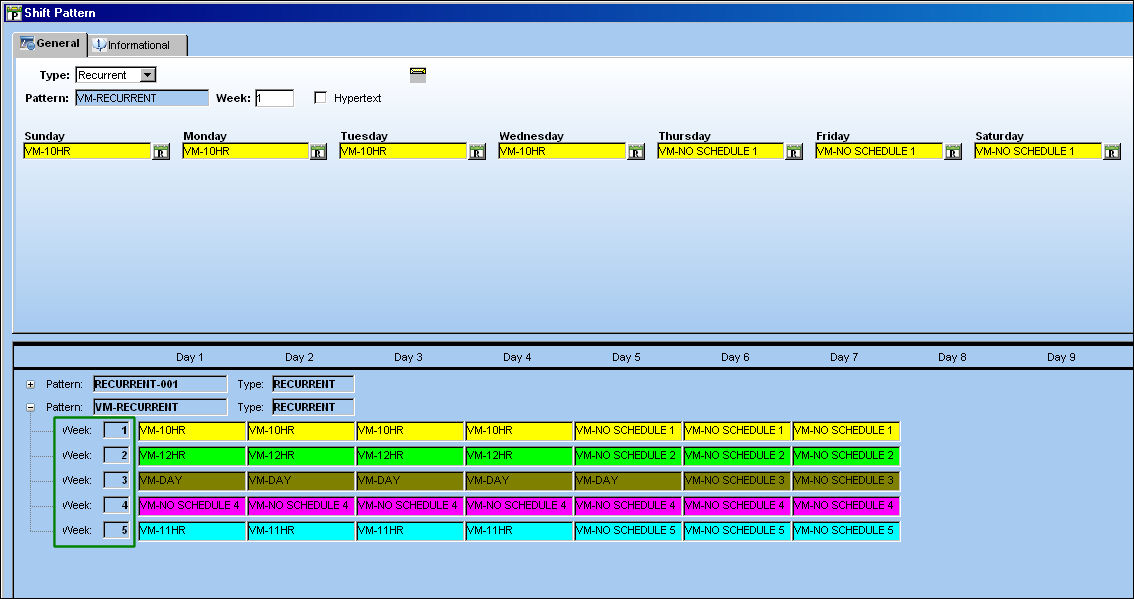
When the Recurrent Pattern is selected via the Employee Schedule window, the From Week field will appear. This field is used to designate the week number that the employee schedule is to begin from. For instance, when Week 1 is entered the schedule will begin from the first week. Notice how Week 1 in the above image is the beginning week for the employee schedule below. After all of the 5 weeks appear on the schedule, the Recurrent Pattern will cycle once again from Week 1.
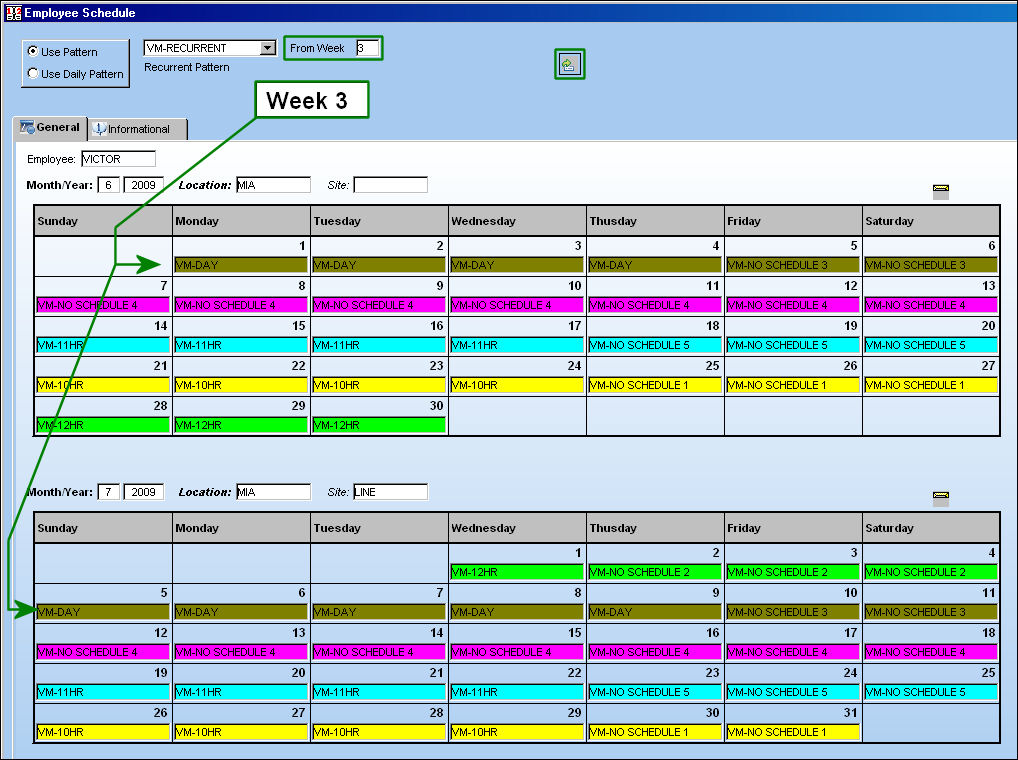
When Week 3 is entered into the From Week field, the schedule will begin from the third week of the Recurrent schedule. Weeks 4 and 5 will follow then the cycle will repeat beginning at Week 1.
For more information regarding the Man Hours Schedule window and all of its tabs refer to the Man Hour Schedule section of the Planning Manual.
Share
Print
|
©1997-2026 Trax USA Corp. All rights reserved. This manual may not be copied, photocopied, reproduced, translated, or converted to any electronic or machine-readable form, in whole or in part, without prior written approval from Trax USA Corp. |
 |