
 Share
Share
 Print
Print
|
|
|
|
|


If an Invoice is received for an order and the quantity of parts received does not match the quantity of parts on the order, users can create an Invoice for the received item, then use the Order – ADD functionality to add the additional items to the order at a later date.
The Order - ADD Category cannot be used for Purchase Order invoice payments.
First, an order is created via Orders/ Update. In the example below, the user created an Exchange Order.
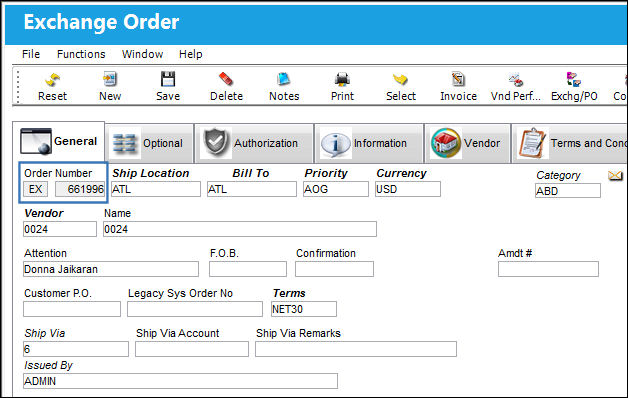
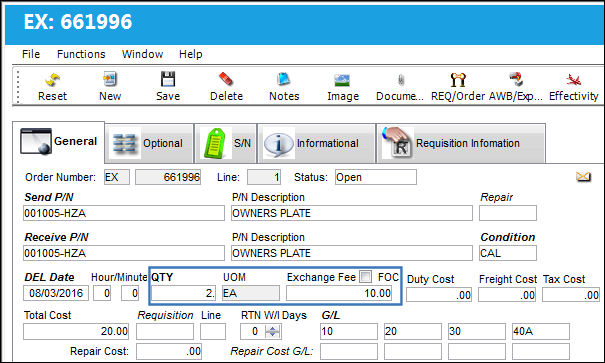
In this example, an Exchange Order was created containing 2 of the same part. Each part costs $10.00 for a Total Cost of $20.00.
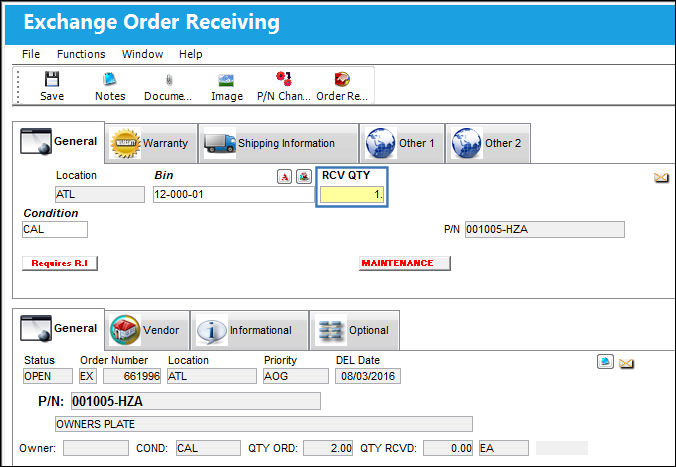
Once the Exchange Order is created, the items on the order must be received. Go to Exchange Order Receiving. In this example, we are going to partially receive the order. Instead of receiving the total of 2 parts, we will receive only 1.
The effect of creating this Exchange Order and partially Receiving 1 of 2 parts is displayed as follows via G/L Interface/ Query/ Journal Entries Query/ General tab:
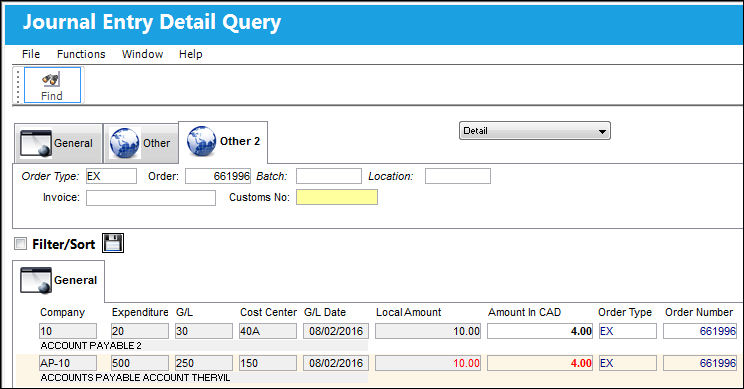
(cont.)
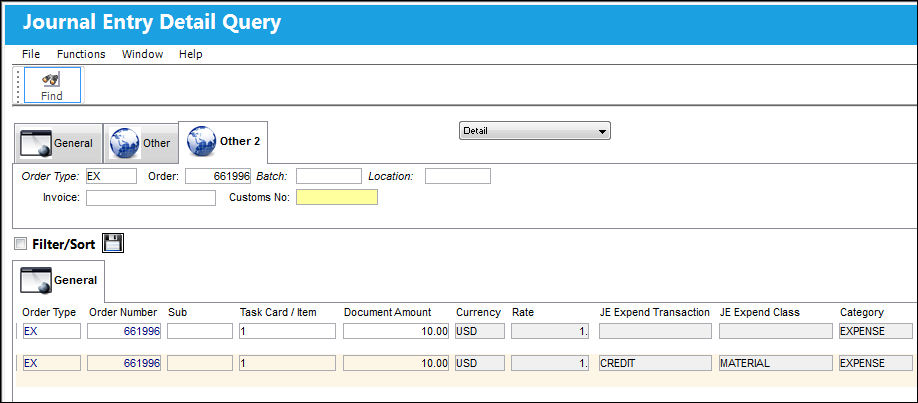
Entering The Invoice:
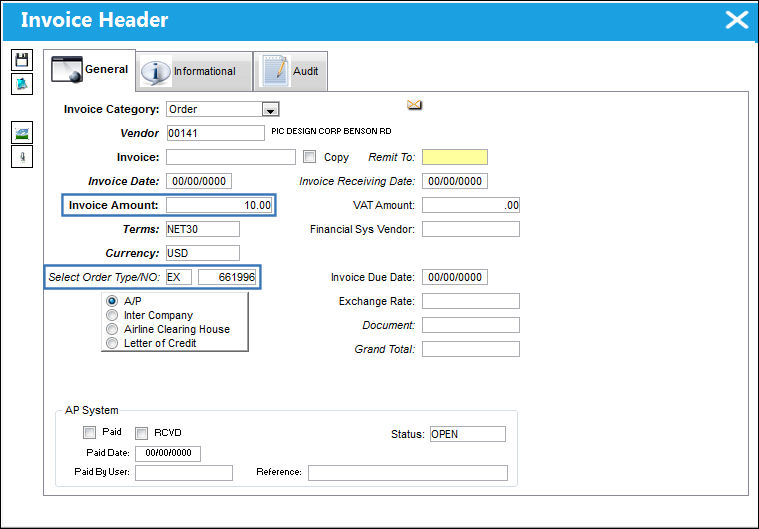
Go to Links/Update/Invoice Entry. Select the New  button to enter a new invoice. This window contains the basic information required for the invoice.
In this example, the received invoice charges for a portion of the total appearing on the original Purchase Order. Recall that in this example, we have created an Exchange Order containing 2 of the same part. Each part costs $10.00 for a Total Cost of $20.00. Since we only received 1 part, the total of this particular invoice is $10.00 (entered in the Invoice Amount field).
Please refer to the Entering a New Invoice section of this manual for additional information on entering new invoices.
Select the Save  button to save all information.
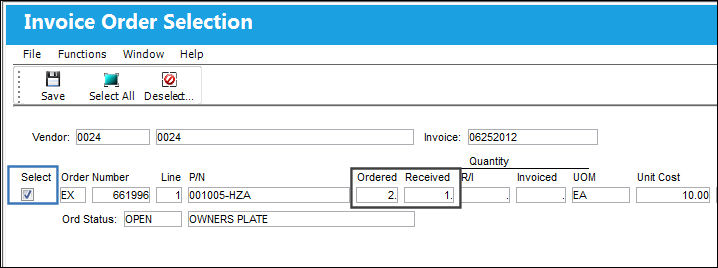
The Invoice Order Selection window will appear. Notice that the record indicates that there are 2 parts ordered but only 1 part is received. Check the Select checkbox of the relevant order and select the Save button.
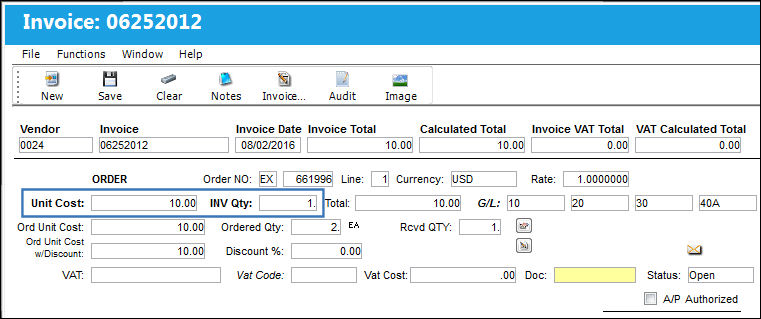
The Invoice Order Item Detail will appear. Enter the Unit Cost. Enter the INV Qty of 1.
To add a Labor Cost, the appropriate G/L Account has to be entered manually so that it is reflected in the Journal Entry Detail Query.
Select the Save button.
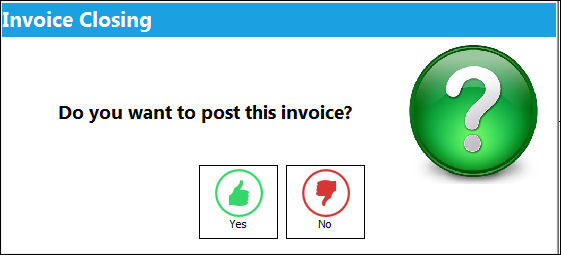
The user will be asked to Post the Invoice. Select Yes to have the system post the transaction (create Journal Entries for the transaction amounts). The status of the invoice will automatically go to Paid once the user has selected 'Yes'.
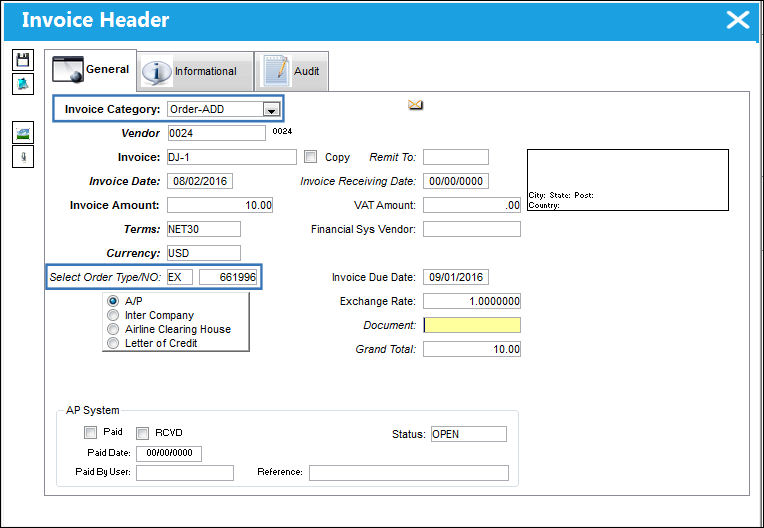
Order – Add (Invoice Category):
Once the remaining parts on the order are received (via the Receiving module) go to Links/ Update/ Invoice Entry.
Select the New button and choose Order - ADD from the Invoice Category drop down list:
This option is selected to allow the user to create an invoice entry and add that Invoice to an already invoiced existing order number. For the Invoice Amount field, recall that in this example, we have created an Exchange Order containing 2 of the same part. Each part costs $10.00 for a Total Cost of $20.00. Since 1 part has already been received, and will receive the remaining parts with this transaction, this particular invoice amount is $10.00 (entered in the Invoice Amount field).
Complete all fields as necessary. Please refer to the Entering a New Invoice section for additional information on entering this invoice if required. Select the Save button
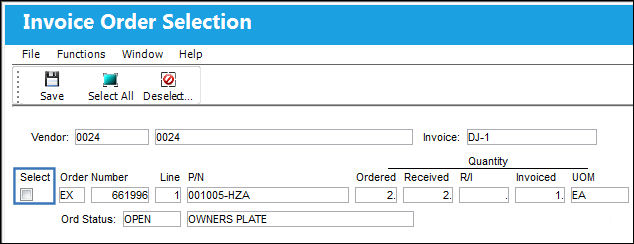
The Invoice Order Selection window will appear. Notice that the record indicates that there are 2 parts ordered and received. Check the Select checkbox of the relevant order and select the Save button.
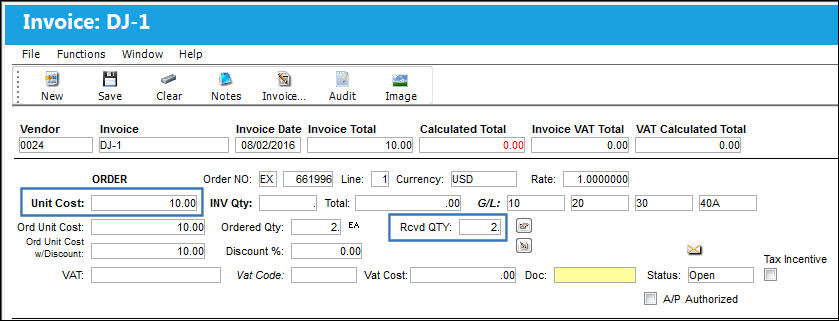
After saving, TRAX displays the Invoice Order Detail window. Both parts have now been received and the second part can now be added onto the original invoice. Select the Save button.
The user will be asked to Post the Invoice. Select Yes to have the system post the transaction (create Journal Entries for the transaction amounts). The status of the invoice will automatically go to Paid once the user has selected 'Yes'.
Share
Print
|
©1997-2026 Trax USA Corp. All rights reserved. This manual may not be copied, photocopied, reproduced, translated, or converted to any electronic or machine-readable form, in whole or in part, without prior written approval from Trax USA Corp. |
 |