
 Share
Share
 Print
Print
|
|
|
|
|


The Wall by Program  view is the first option in the Security Explorer, Other Options menu. Wall password security is assigned by TRAX administrators to different employees used for completing transactions and other duties. For example, a user group named 'MECH' could be used to combine several mechanics on the floor with one shared login password, but individual Wall passwords for each Employee record within that user group.
Further, if a user or user group has Wall security clearance they will not have to enter a password for the specific transaction; if they do not have clearance they will have to enter their Wall password:
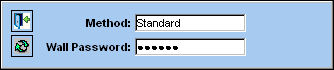
Wall security can be applied to various transactions which can be found throughout the TRAX modules and categories. What separates the Wall by Program view from the Classic TRAX method for applying Wall security is that the Employee Wall Password System Add Button requires administrators to select one user/group profile first then apply Wall security for the different programs. The Wall by Program window allows administrators to select a program then assign Wall security to all users at a time or as many users/group profiles as needed.
When the Wall by Program option is selected, TRAX displays the following:
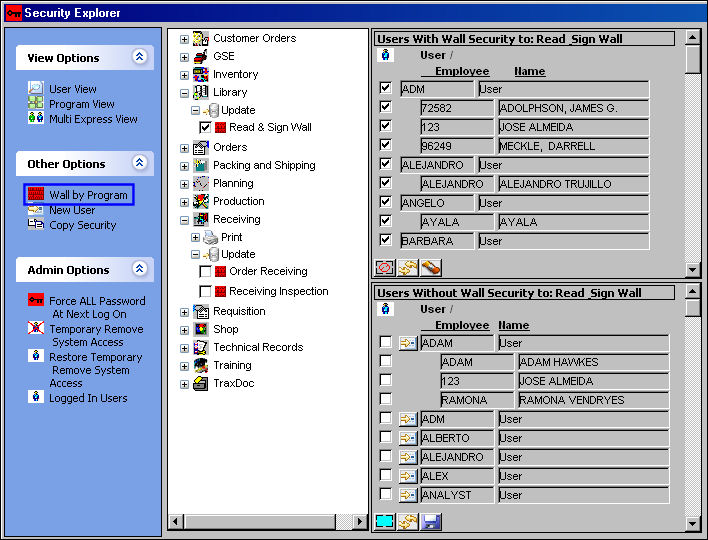
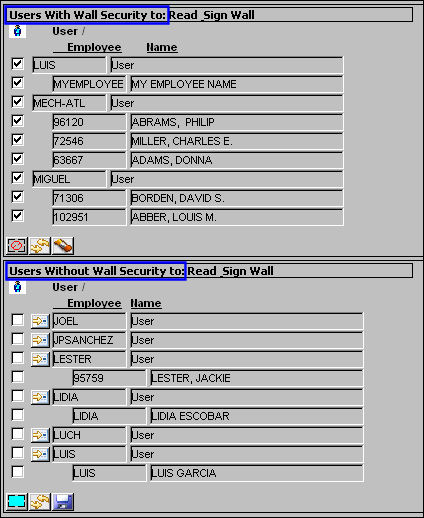
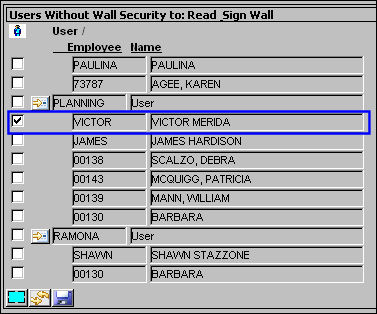
The window is divided into two panes. The left pane lists all of the available options for Wall security while the right pane lists all of the users and group profiles. The right pane is then divided into two sections. The top section lists all of the employees/group profiles with Wall security access while the bottom section lists all of the users without access:
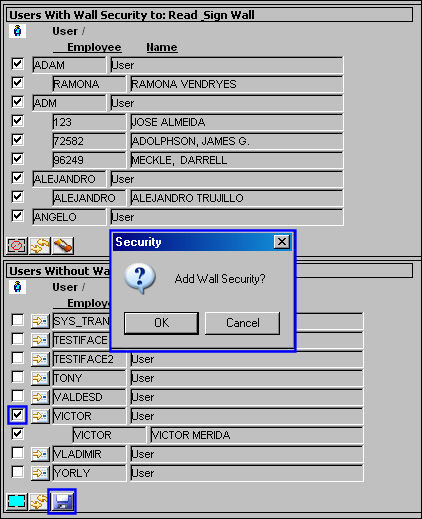
To apply Wall security to a user who does not have security, select the checkbox to the left of the user in the bottom section then select the Save  button. A prompt will ask if the user is sure about the change. Select 'OK.'
To remove Wall security access from a user, de-select the checkbox to the left of the user in the top section then select the Delete  button. A prompt will ask if the user is sure about the change. Select 'OK.'
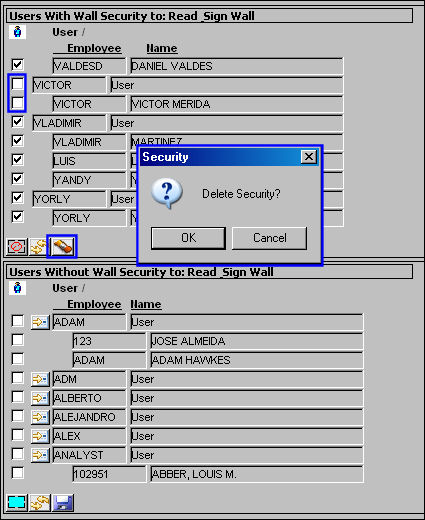
Administrators can also use the Selection buttons to add or remove Wall security access to all users. The selection buttons can be found at the bottom of the 'Users With Wall Security to' and the 'Users Without Wall Security to' fields.
The following information/options are available in this window:
_____________________________________________________________________________________
Select All  button
Selects all users by placing a check in the checkbox next to the user's names.
De-select All  button
De-selects all users by removing the check from the checkboxes next to their names.
Reset  button
- All of the de-selected checkboxes in the above section will be selected again.
- All of the selected checkboxes in the below section will be de-selected again.
Save button
All of the selected users will be removed from the 'Users Without Wall Security to' field and will be placed in the 'Users With Wall Security to' field.
Delete button
All of the de-selected users will be removed from the 'Users With Wall Security to' field and will be placed in the 'Users Without Wall Security to' field.
_____________________________________________________________________________________
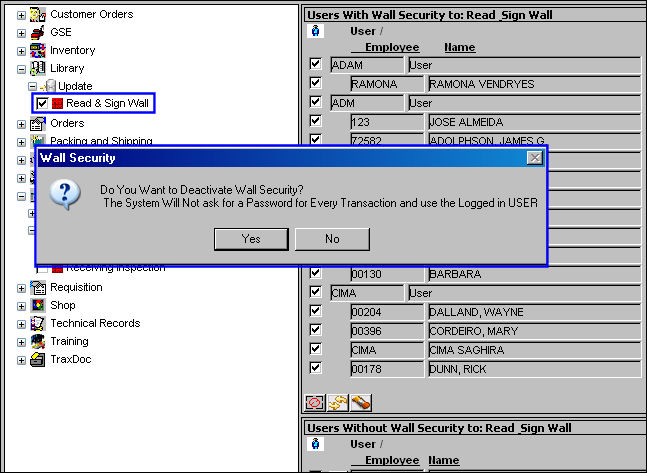
Another option administrators have for assigning Wall security is by applying or removing access for all users at a time for a selected program. To do this, select a program from the left pane. If the checkbox to the left of the program is checked, administrators can remove access for all users by de-selecting the checkbox. Before de-selecting the checkbox, a prompt will ask the following:
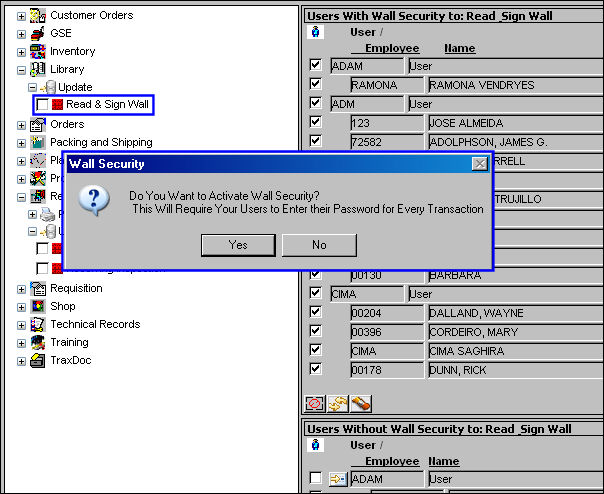
If the checkbox to the left of the program is not checked, administrators can add access for all users by selecting the checkbox. Before selecting the checkbox, a prompt will ask the following:
Wall Password security can also be applied to group profiles. Group profiles can be found throughout the right pane and will appear as follows:
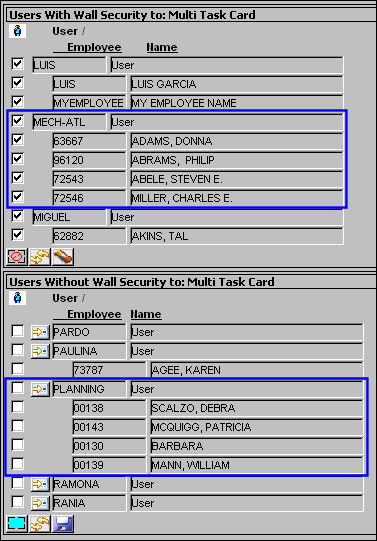
Group profiles will be composed of a parent category (i.e.: 'MECH', 'PLANNING', etc.) then sub categories below (i.e.: individual users). When applying access to a group, administrators can select all of the members within a group by selecting the parent category alone. (Administrators can also remove access from a entire group by de-selecting the parent category of a group profile.)
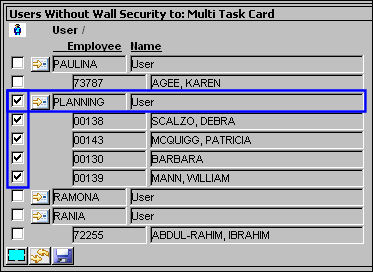
Even if an entire group is selected, individual users within the group can be manually de-selected without affecting the rest of the group.
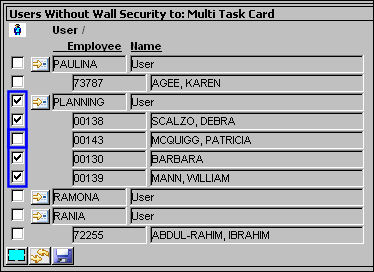
Similarly, users from within a group profile can be selected without selecting the entire group.
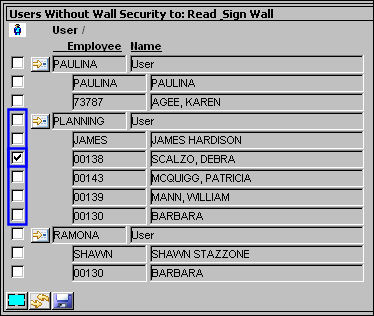
From the Wall by Program window, users can be added to existing group profiles by selecting the New  button to the left of the group profile parent category.
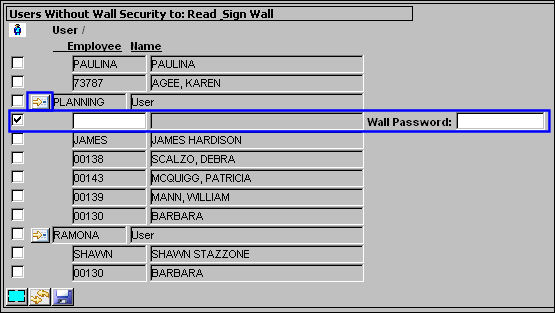
After selecting the New button, enter the employee name (or right-click for a drop down selection pop up window) then add the Wall Password if the field does not immediately populate after entering an employee name.
After adding a user to a group profile, that user will function just like all of the other users from that profile.
Share
Print
|
©1997-2026 Trax USA Corp. All rights reserved. This manual may not be copied, photocopied, reproduced, translated, or converted to any electronic or machine-readable form, in whole or in part, without prior written approval from Trax USA Corp. |
 |