
 Share
Share
 Print
Print
|
|
|
|
|


The STYLESHEET Editor is a RTF (Rich Text Format) Editor which allows the user to enter the Task Card item text using the available RTF options. Please see descriptions for the various options and buttons below.
Go to Engineering/Update/Task Card.
Select the New  button and populate all mandatory Task Card information in the General Tab. Select the Optional 1 Tab and populate all mandatory information. Be sure that the desired Editor is selected (i.e. STYLESHEET) before saving the Task Card. Once the Task Card is saved, the Editor field will be grayed out, by locking the Editor selection.
For more information on the above instructions, please see the NONE Editor.
Go to Engineering/Update/Task Card/Task Card Item button.
When the STYLESHEET Editor is selected, the Task Card Item Window will appear. Enter the appropriate Task Card Item instructions. Select the Skills Tab and populate all mandatory information. Use the Stylesheet buttons to format the text. See following description for options and buttons. Select the Save  button. The Save Prompt will appear. Select OK. The item instructions will appear on the lower half of the Task Card.
For more information on the Skills Tab, please refer to the NONE Editor.
Repeat above instructions as needed to create multiple Task Card items.
 The user may set up the default configuration for the format of the stylesheet for the Task Card Editor via the Task Editor Style
  button. For additional information on how to set this up, refer to Switch
  TCEDITOR via the Engineering Switches Manual.
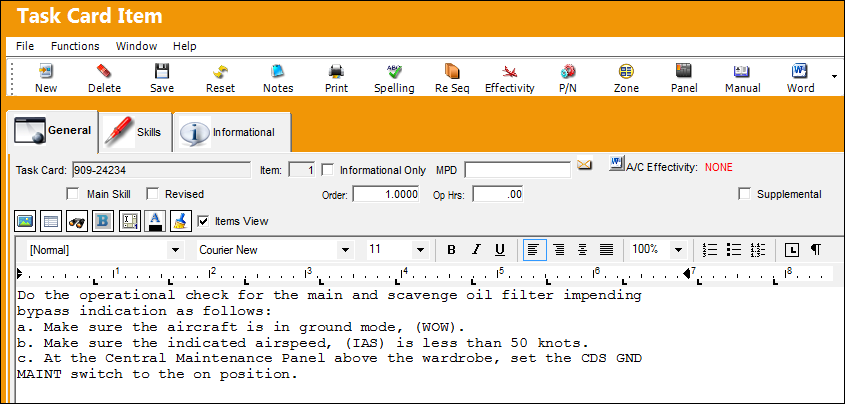
The following information/options are available in this window:
_____________________________________________________________________________________
Task Card
The Task Card / Job Card that details the scheduled maintenance work.
Item
The item number required to accomplish a Task Card.
Informational Only checkbox
Select if this item is for an informational step only (no labor required). When selected, the Main Skill checkbox will be removed from this window.
MPD
The Maintenance Planning Document reference for this Task Card.
Main Skill checkbox
Select this checkbox if this is the primary skill of the Task Card. The user can then organize the Task Cards by primary skill (using filter and sort functionality via the related modules such as Production Work Orders.)
Revised checkbox
If the item has been revised selecting this checkbox would flag the Task Card item with a revision bar on the left of the item on the Task Card print when printed out. For additional information refer to Switch RMVRVBAR via the Engineering Switches Manual.
Op Hrs
Operation Hours.
A/C Effectivity
The record will display an alert message that indicates how Effectivity has been set up. If all aircraft are effective, "ALL" will be displayed on the General Tab of the Task Card and on the Task Card Item window. If some aircraft are effective, "PARTIALLY" will be displayed. If no aircraft are effective, "NONE" will be displayed. If A/C Effectivity is set to 'All' and the currently logged in user only has security access to specific aircraft, Effectivity will display as 'Partial'.
Items View checkbox
Select this checkbox to have Task Card items display in the window. Deselect the checkbox to view the full screen to edit selected item text.
Style drop down
Select default, normal, or default paragraph font, or created personalized ones.
Font drop down
Select font style type face.
Font Size drop down
Select font point size.
_____________________________________________________________________________________
Insert Image  button
Select this button to insert an image in the items field. The Stylesheet Editor does not support .png images for the Rich Text Editor.
There is a size limitation for images that can be attached to an item. The recommended resolution in pixels is 1200x1200.
Insert Table  button
Select this button to create a table.
Find  button
Select this button to Find and replace text.
Font  button
Select this button to select a font style, size, attributes, color of text and background.
Paragraph  button
Select this button to select line spacing, alignment, indents and distance of space from the top and bottom of a page.
Automatic  button
Select this button to select a color (defaulted to black).
Format Painter  button
Select this button to format text.
Bold  button
Select this button to make text bold.
Italic  button
Select this button to italicize text.
Underline  button
Select this button to underline text.
Align Left  button
Select this button to align text to the left.
Align Right  button
Select this button to align text to the right.
Align Center  button
Select this button to center text.
Align Justified  button
Select this button to evenly space text so that both left and right justifications are established.
Zoom drop down
Select this drop down to increase or decrease the size of the view.
Numbering  button
Select this button to establish an enumerated list in a document.
Bullets  button
Select this button to establish bullets in a document.
Left Tab  button
Select this button to establish a left tab stop in a document.
Right Tab  button
Select this button to establish a right tab stop in a document.
More than one right tab can be established.
Center Tab  button
Select this button to establish a centered tab stop in a document.
More than one left tab can be established.
Decimal Tab  button
Select this button to establish a decimal tab stop in a document.
More than one decimal tab can be established.
Right Bar Tab  button
Select this button to establish the right margin for a document.
Only one right bar tab can be established.
Show/ Hide Characters  button
Select this button to display formatting characters as user is creating a document (i.e. spacing).
Word  button
Select this button to open and use a Word Template for creating a Task Card.
Upload RTF  button
The Upload RTF button allows the user to create a Task Card using a preferred format (.ie. MS Word). Create Task Card item instructions in a Word document and save it as a .RTF.
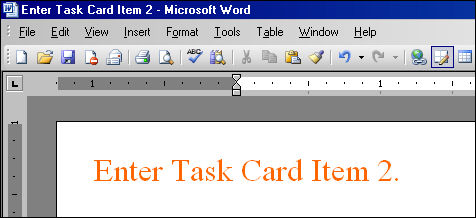
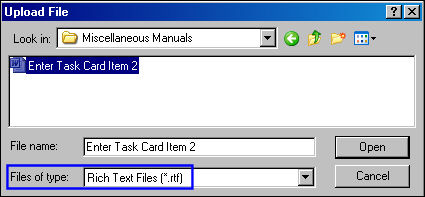
In the Task Card Item window, select the Upload RTF button. The Upload File window appears. Open a .RTF file that contains Task Card instructions. Select 'Open.'
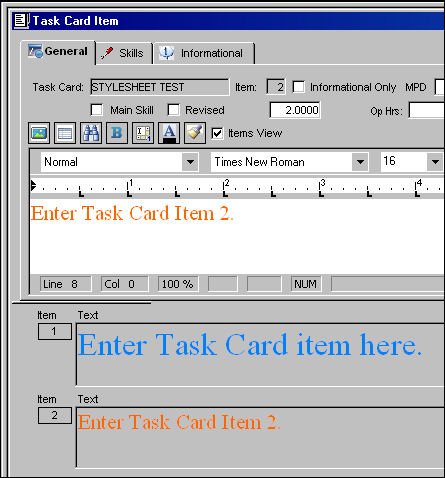
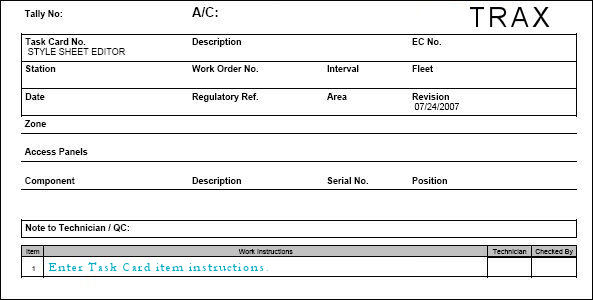
TRAX adds the Task Card item instructions as shown below:
_____________________________________________________________________________________
Select the Print  button. The Task Card Print will load and merge the item print to the Stylesheet template.
Share
Print
|
©1997-2026 Trax USA Corp. All rights reserved. This manual may not be copied, photocopied, reproduced, translated, or converted to any electronic or machine-readable form, in whole or in part, without prior written approval from Trax USA Corp. |
 |