
 Share
Share
 Print
Print
|
|
|
|
|


The tool should be properly set up in the P/N Master. Go to Settings/Update/P/N Master. Select a part number to edit or create a new one by clicking on the New  button. Here we will confirm that the tool is set up properly for the Tools Locator functionality to work correctly. The Tool Calibration checkbox must be checked on the part for proper functionality.
The following page addresses the P/N Master featuring the Tool setup process. For full details about the P/N Master, please refer to the Settings Training Manual.
TRAX displays the following P/N Master Screen with Tools as the selection for Category (highlighted below):
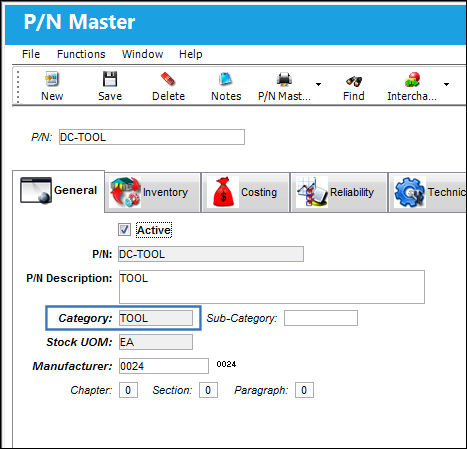
The following information/options are available in this window:
_____________________________________________________________________________________
Active checkbox
Select this checkbox if the tool is active.
P/N
The Part Number reference for the aircraft part.
P/N Description
The description of the part.
Category
The category of the tool should be selected here. Nevertheless, the flag set here does not influence the tool functionalities throughout the system. Parts that are marked as tools in the Inventory tab will be considered as tools throughout the system no matter what the part category is.
Sub-Category
The sub-category of the tool.
Stock UOM
Stock unit of measure.
Manufacturer
The manufacturer's code and name.
Chapter/Section/Paragraph
The ATA chapter/section/paragraph, as applicable.
_____________________________________________________________________________________
Next, select the Inventory Tab in the P/N Master, as seen in the following window:
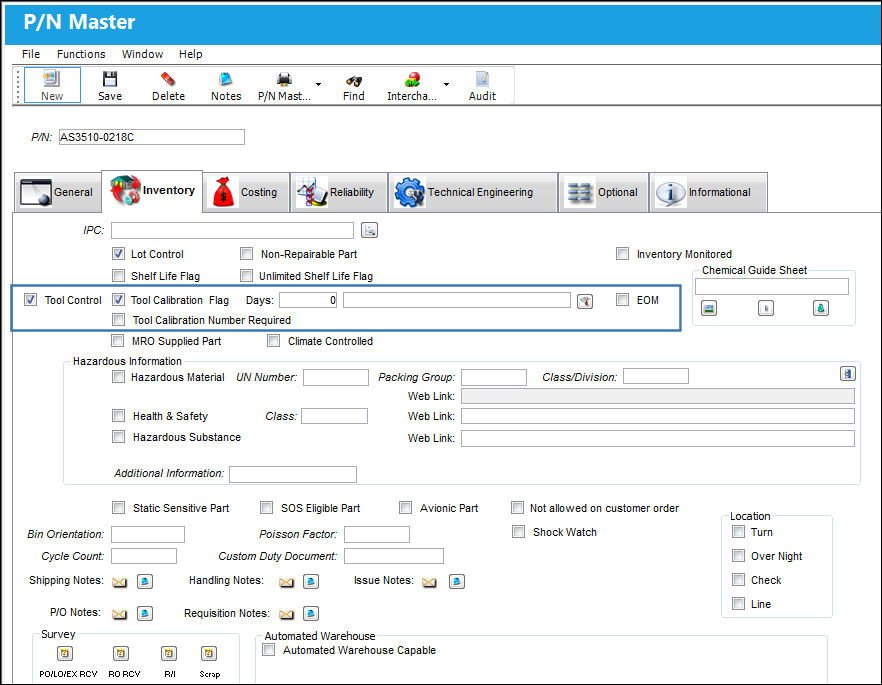
The following information/options are available in this window:
_____________________________________________________________________________________
Tool Control checkbox
In Order for the Tools Check-In and Check-Out functionality (via Inventory/ Update/ Inventory Transaction) to work correctly, this must be checked to indicate the part is a tool.
The Tool Calibration checkbox, which indicates whether the tool requires calibration, will appear once the Tool Control checkbox has been checked. Users can set the number of calibration days in the Days field. These two checkboxes allow reports (via Inventory/ Prints) to be generated to track tools' issuance and calibration (with calibration task description) as required.
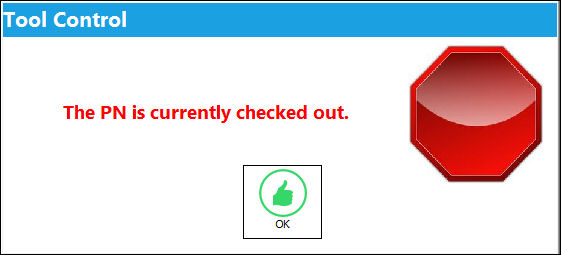
The Tool Control checkbox cannot be deselected for tools that are already checked out. If the user tries to do so, the following error will appear:
Tool Calibration Flag checkbox
Check this box to indicate that this Tool requires calibration. This checkbox is only available when the Tool Control checkbox is selected.
 This checkbox is security controlled via Settings/ Update/ P/N Master. Although the checkbox may be visible, the user will be unable to select/deselect it without the appropriate security access. For additional information, refer to the Security Explorer via the System Administration Training Manual.
Tool Calibration Number Required checkbox 
Select this checkbox to activate the Tool Calibration Number field when a Tool is received. When this checkbox is selected, the Tool Number field will be available via Receiving Inspection and all Inventory related windows. This checkbox is only available when the Tool Control checkbox is selected. For additional information regarding the Tool Calibration Number, refer to Repair Order Receiving, General tab, via the Receiving Training Manual.
This checkbox is security controlled via Settings/ Update/ P/N Master. Although the checkbox may be visible, the user will be unable to select/deselect it without the appropriate security access. For additional information, refer to the Security Explorer via the System Administration Training Manual.
Days
Enter the number of default days. The number of days entered will be applied to parts received as their standard shelf life. The date can be amended at that time also. Specify the number of days between calibration. A free field allows to enter any kind of information related to the calibration. This field and the description field to its right appears when the Tool Calibration checkbox is selected. Enter further details about the Days in the next available text field.
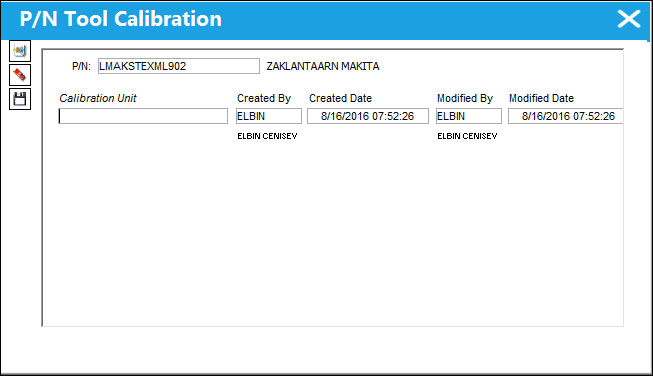
P/N Tool Calibration  button
Click this button to open a pop-up window that allows you to enter several calibration intervals.
_____________________________________________________________________________________
These checkboxes allow reports (via Inventory/Prints) to be generated to track tools’ issuance and calibration (with calibration task description) as required.
In Inventory/Update/Inventory Transaction, select Tools Locator from the Transaction Type drop-down menu, as displayed below:
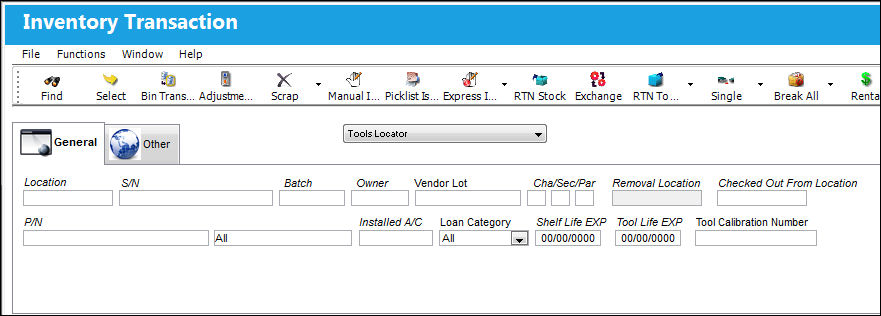
As with the majority of the query selections on the system, it is better to select as many parameters as required to minimize your search result.
Once you have selected the criteria, click on the Find  button. TRAX displays your search results, as follows:
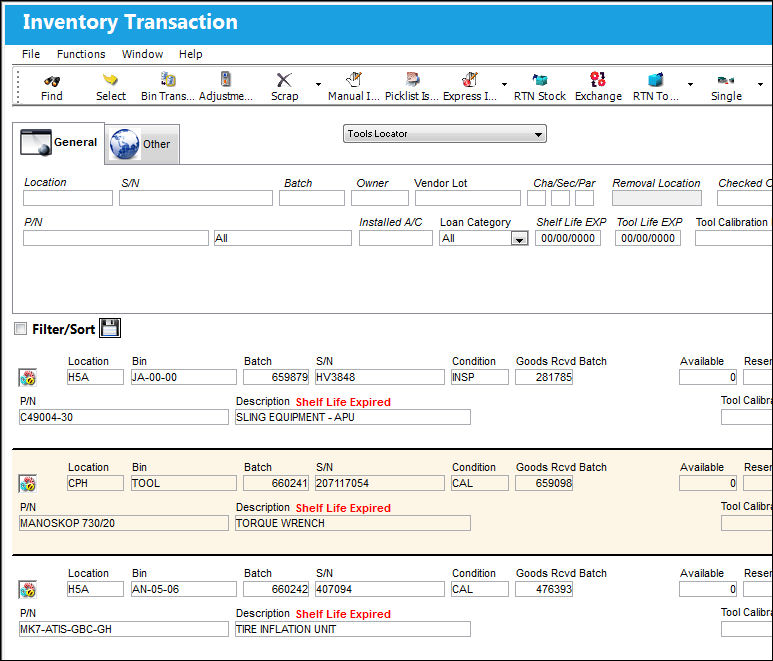
Confirm that the Hand  pointer is pointing to the record with which you want to work by clicking on the record.
You can check the tool out of inventory or check it back into inventory (once it has been checked out).
 Share
Print
Share
Print
|
©1997-2026 Trax USA Corp. All rights reserved. This manual may not be copied, photocopied, reproduced, translated, or converted to any electronic or machine-readable form, in whole or in part, without prior written approval from Trax USA Corp. |
 |