
 Share
Share
 Print
Print
|
|
|
|
|


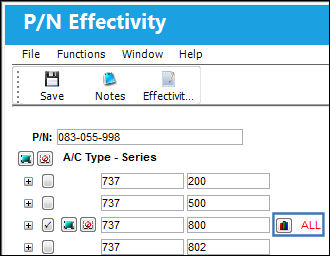
The P/N Range  button takes the user to the P/N Effectivity window. This window allows the user to apply effectivity to an aircraft by using the A/C, A/C S/N, Line, Variable Number, SGML Designator or IPC of the aircraft.
This button will only appear next to an A/C Type/Series if that Type/Series is effective to the specified P/N and has been set up with a range for one or more of the range types listed below.
From the P/N Effectivity window, select the Part Number Range button.
Select the New  button to create a range of effectivity for the P/N. Once the type and range are selected, select the Save
  button.
In the following example, the user will select the Delete  button to delete the highlighted (highlighted in green) effectivity.
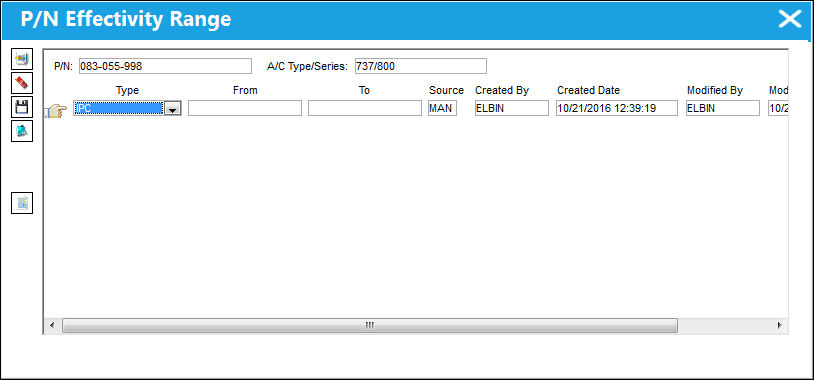
The following information/options are available in this window:
_____________________________________________________________________________________
Type drop down
Select the range Type from the drop down menu. This option allows the user to easily enter a range without having to override the record to the A/C S/N level. For example, this option is used when an AD states a specific range that the AD is effective to. The user does not have to override the A/C Type/Series to manually select/deselect the necessary A/C Tail Numbers.
A/C  - This information is pulled from the A/C Master, General tab.
S/N (Serial Number) - This information is pulled from the A/C Master, General tab.
Line - This information is pulled from the A/C Master, Optional 2 tab.
Variable No - This information is pulled from the A/C Master, Optional 2 tab.
SGML Designator - This information is pulled from the A/C Master, Optional 2 tab.
IPC - This information is pulled from the A/C Master, Optional 2 tab.
From-To Range
Enter the From - To range for effectivity to be applied.
Source
The way that the range was imported/created. This field is updated automatically. The available options are E/C, IPC, and MAN (Manual). The Source is 'MAN' when any part of the range was entered or altered manually.
Created By
The user who created the record.
Created Date
The date the record was created.
Modified By
The user who last modified the record.
Modified Date
The date the record was last modified.
_____________________________________________________________________________________
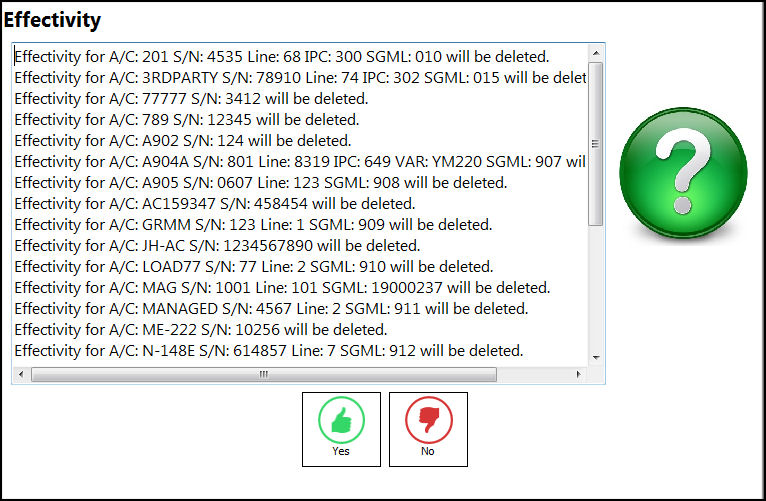
The Effectivity pop-up message appears. The user can see if the part is installed on an aircraft before removing effectivity. All installed parts will be listed first in the Effectivity pop-up.
The user may select the Print  button to print the information in the Effectivity pop-up.
For information regarding how to apply effectivity to a range of Serial Numbers, Lines or IPC, refer to the Task Card Range Button, via the Task Card Buttons of the Engineering - T/C Training Manual.
Additional functionality is available through the following:
Share
Print
|
©1997-2026 Trax USA Corp. All rights reserved. This manual may not be copied, photocopied, reproduced, translated, or converted to any electronic or machine-readable form, in whole or in part, without prior written approval from Trax USA Corp. |
 |