
 Share
Share
 Print
Print
|
|
|
|
|


To organize the placement and organization of a specified Location's Trays for the Murata Interface, select the Tray Master  button via the Settings/Update/Location Master window. From this window, users can organize the Bins within trays and the amount of Bins each Tray can hold.
 This button is part of a customized interface and is therefore not functional for all TRAX customers. This button is only available when Interface Switch
  MURATA is set to Yes.
 Note: This button is security controlled via Security Explorer/Settings/Update/Tray Master Button. For more information refer to the Security Explorer via the System Administration Training Manual.
From the Location Master, find the Location operating the MCM interface then select the Tray Master button. Once selected, the Tray Master Selection window appears. This window lists each Tray at the chosen Location in the bottom portion of the window. Each Tray is depicted with each associated Bin.
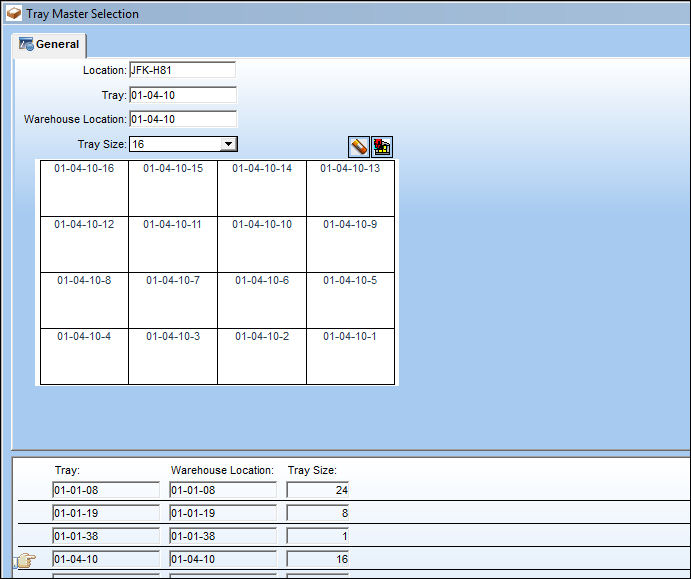
The following information/options are available in this window:
_____________________________________________________________________________________
Location
The location containing the MCM interface.
Tray
The Tray within the Location.
Warehouse Location
The location of the Tray within the warehouse.
Tray Size drop down
The size of the Tray. This specifies the amount of Bins in the Tray. The options are 1, 8, 16, or 24. When either of these options are selected, the Tray layout is depicted at the bottom of the screen. Within this graphical representation of the Tray, each section of the Tray designates a Bin. (The above example is of a Tray with 16 Bins.)
_____________________________________________________________________________________
New Trays can be created by selecting the New  button.
The Trays are laid out at the bottom of the window with each Bin from the Tray displayed. Users can remove selected Bins from the Tray by selecting the Tray then clicking the Delete  button.
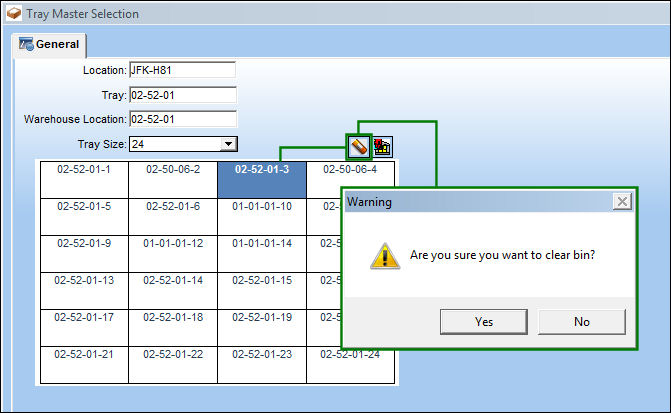
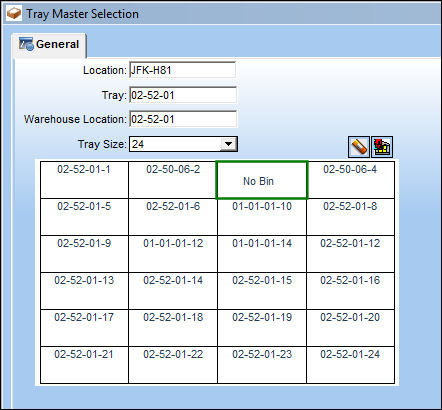
Once the Bin is removed from the Tray, the empty space where the Bin was now reads 'No Bin.'
To add Bins to the Tray, select the Add Bins  button. Once selected, all of the Bins for the chosen Location are listed.
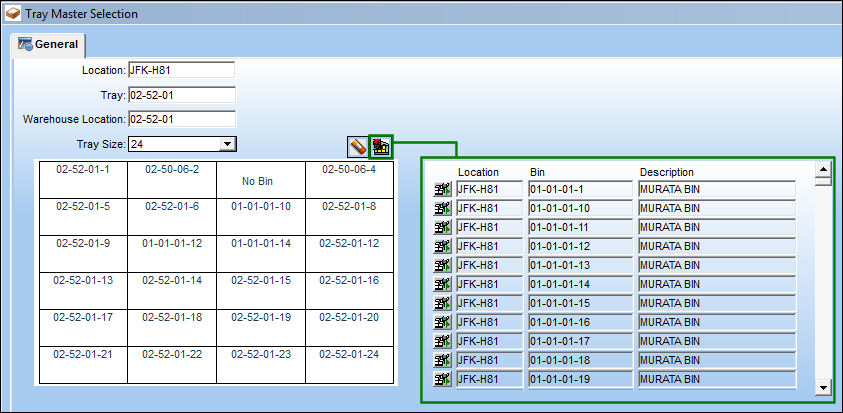
To add the required Bin into the empty slot in the Tray, select and hold the Add Bin  button next to the required Bin then drag it into the empty slot in the Tray.
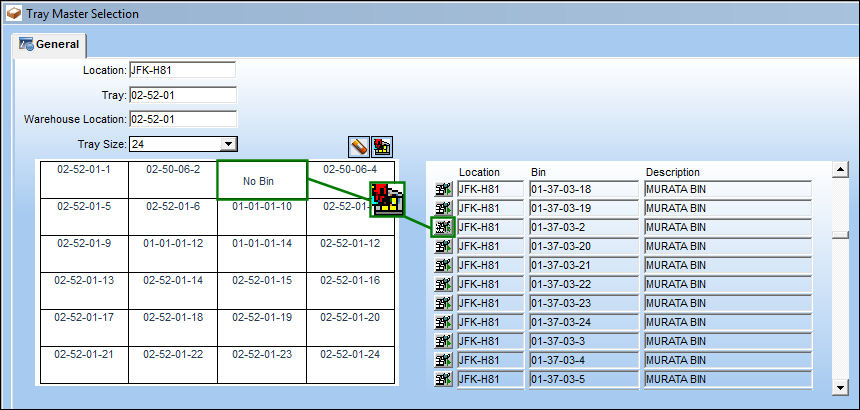
Once the Bin is dropped into the Tray, the slot then reads the Bin number.
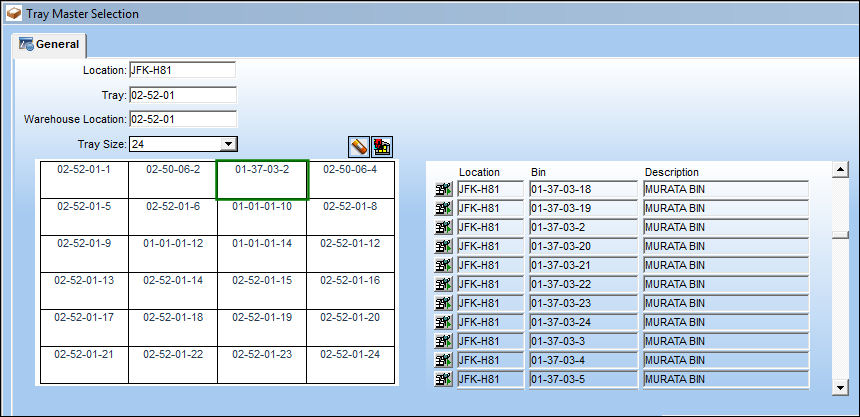
Users can double-click in the Bin to view all of the associated Batches stored in the Bin.
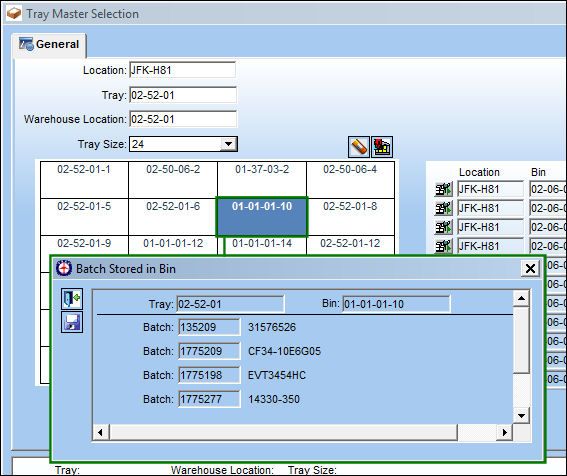
The Batch Stored in Bin window displays the following fields:
_____________________________________________________________________________________
Tray
The Tray where the Bin is stored.
Bin
The selected Bin.
Batch
The Batch(es) in the Bin.
P/N Description
The description of the Batch P/N in the Bin.
_____________________________________________________________________________________
Tray/Bin View Mode:
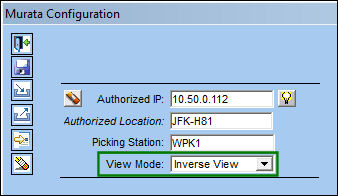
The layout of the Bins in the Trays on the screen can be configured from the Murata Configuration window. This layout depends on the perspective of the person in the Picking Station. From the Murata Configuration window, the View Mode for the Picking Station is 'Normal View.'
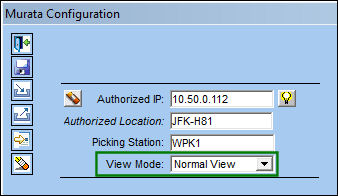
Notice the Bins of the following Tray are listed from left to right, top to bottom.
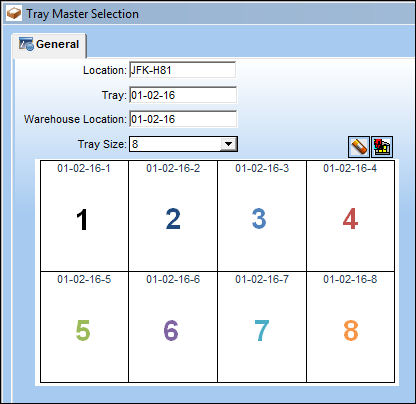
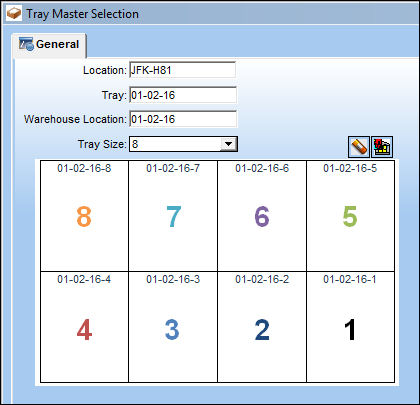
From the Murata Configuration window, the View Mode for the Picking Station is then changed to 'Inverse View.'
Now, from the Tray Master Selection window, the Bins are listed right to left, bottom to top.
Share
Print
|
©1997-2026 Trax USA Corp. All rights reserved. This manual may not be copied, photocopied, reproduced, translated, or converted to any electronic or machine-readable form, in whole or in part, without prior written approval from Trax USA Corp. |
 |