
 Share
Share
 Print
Print
|
|
|
|
|


The MPD manual is published by OEMs in order for the airline to develop a maintenance program. It will create T/C shells and E/Cs. The manufacturer for this manual is Airbus and Boeing.
The system has two different methods for importing MPD Data: through Engineering or TraxDoc. The MPD Data Loader via Engineering can be used to load manuals or maintenance requirements for all manufacturers. The MPD Loader via TraxDoc can only be used to import data from Airbus and Boeing. Also, the Excel file that is used to import data into Trax (via Engineering) can be manipulated prior to the import. In TraxDoc, the system will display pop up messages if the aircraft effectivity is not set up, etc. This set up will have to be rectified manually via the Effectivity  button before the user can continue with the import.
TraxDoc Set Up (MPD):

Create a new TraxDoc.
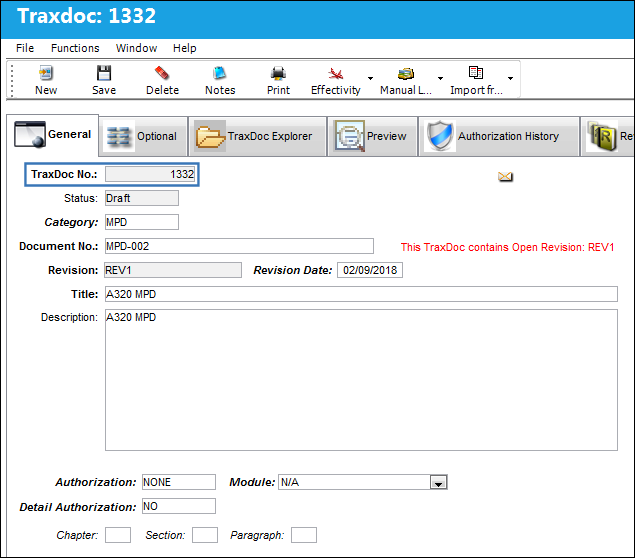
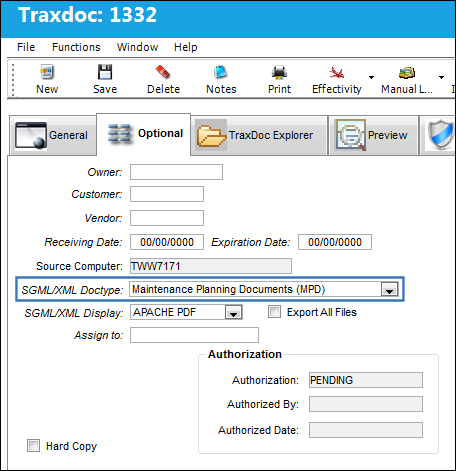
From the TraxDoc Document, Optional tab, select the Maintenance Planning Document (MPD) SGML/XML Doctype:
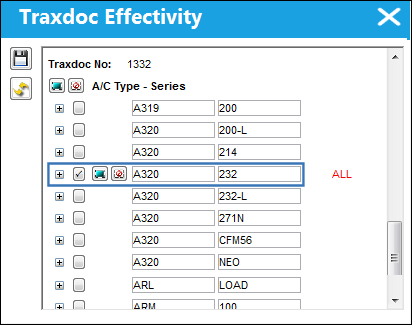
Select the Effectivity button to apply effectivity to the TraxDoc.
Loading an XML into TraxDoc:
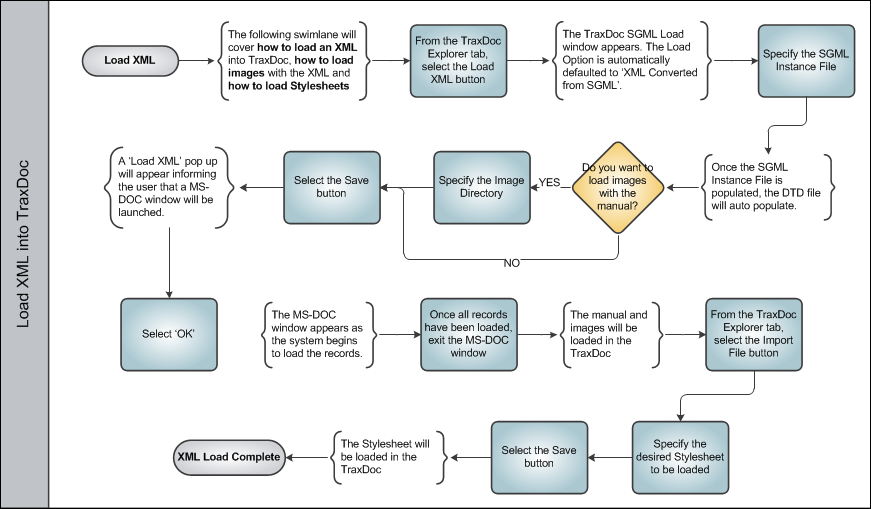
To load an XML into TraxDoc, follow the steps below.
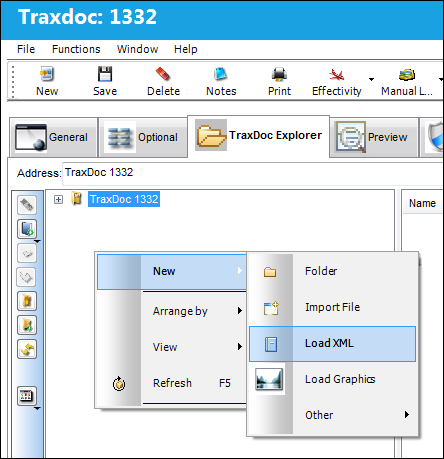
From the TraxDoc Explorer, right click and select the New/ Load XML  button as shown below. The user may also select the Load XML button from the File Multi
  button.
The TraxDoc SGML Load window pops up. Notice that the Load Option is automatically defaulted to 'XML Converted from SGML'. The system will always default the load option to the recommended option.
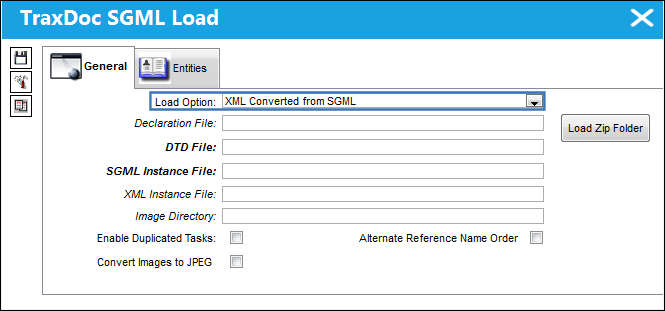
The following information/options are available in this window:
_____________________________________________________________________________________
Load Option
Select from one of the following Load Options:
- XML Converted from SGML
- Graphics
- XML
The default load option for MPDs is XML Converted from SGML.
Declaration File
Select the manual’s declaration file, if any. This file is located in the SGML folder and will end should end in .sdl.
DTD File
Select the manual’s DTD (Document Type Definition) file. This file is located in the SGML folder and should end in .dtd.
SGML Instance File
Select the specified SGML file.
XML Instance File
Select the specified XML file. This does not pertain to the MPD load.
Image Directory
Browse the directory (on the portable media) where images are stored and and select media to be imported.
Enable Duplicated Tasks checkbox
Select this checkbox to load duplicate tasks from duplicate chapters. The TraxDoc XML Load program will add the last four digits of the XML file name to each task, regardless if the task is repeated or not.
Convert Images to JPED checkbox
Select this checkbox to convert images (i,e .PNG, .CGM, etc.) to .JPEG. This checkbox is important for those customers who use a third party DLL who does not support certain image types, therefore they must be converted to .JPEG.
Alternate Reference Name Order checkbox
When this checkbox is selected, elements with ATA information such as Task/Subtask will be in the form (CHAPNBR-SECNBR-SUBJNBR-FUNC-SEQ-VARNBR-CONFLTR). When this checkbox is de-selected, these items will be in the form (CHAPNBR-SECNBR-SUBJNBR-FUNC-SEQ-CONFLTR-VARNBR).
Load Zip Folder
Select this option to load a zipped folder.
_____________________________________________________________________________________
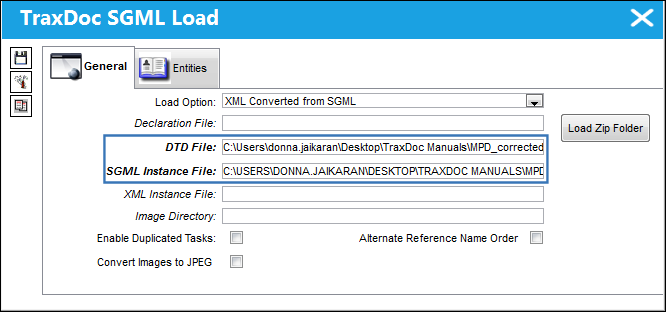
Populate the SGML Instance File field. Once the SGML Instance File is populated, the DTD File auto populates.
Loading Images into TraxDoc:
To load images into a TraxDoc, follow the steps below.
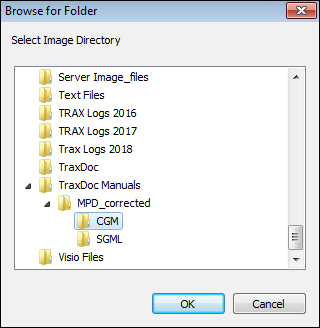
From the TraxDoc SGML Load window, select into the Image Directory field.
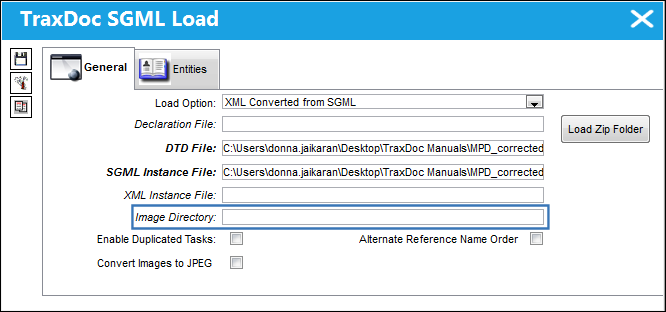
Select the folder that contains the desired images. Select 'OK.'
Once the Image Directory is specified, select Save.
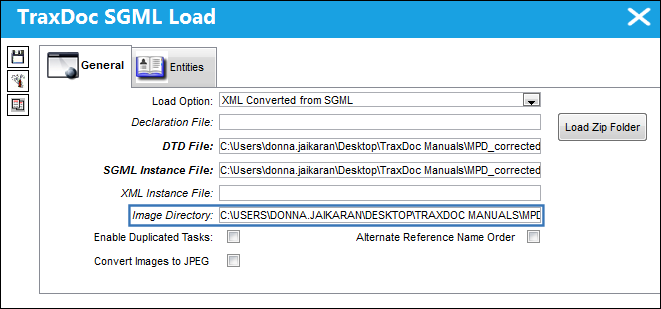
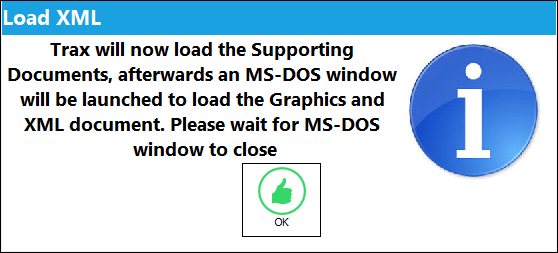
The following Load XML pop up will appear. Select 'OK' to continue with the load.
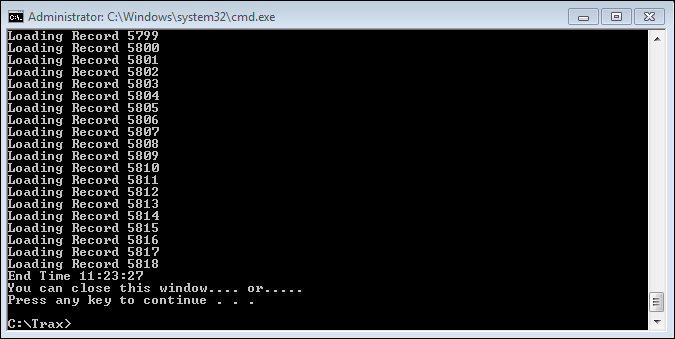
The following MS-DOC window will appear. The system will begin to load the records. The command window will remain open until the XML import is complete. This allows the user to review any errors that may have been generated by the process. Once all of the records have been loaded, the user may exit this window to continue.
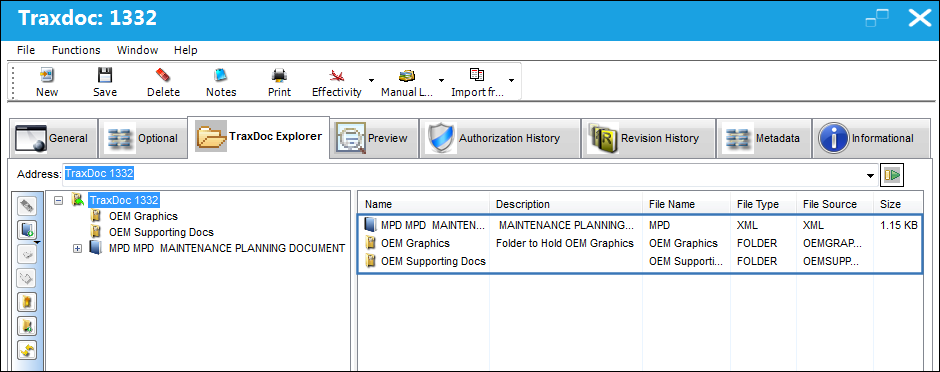
The manual and graphics are loaded in the TraxDoc as shown below:
Load a Stylesheet into TraxDoc:
To load the stylesheet into the TraxDoc, follow the steps below.
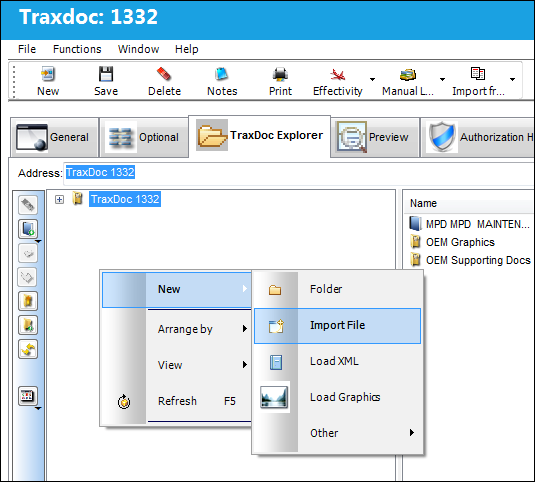
From the TraxDoc Explorer tab, select New/ Import File  button. The user may also select the Import File button from the File Multi button.
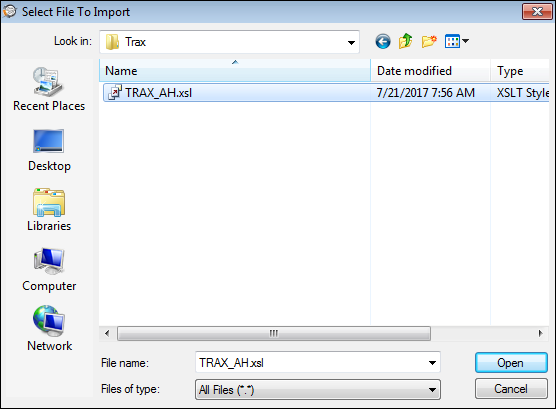
The Select File To Import pop up appears. Locate and select the desired Stylesheet to be imported.
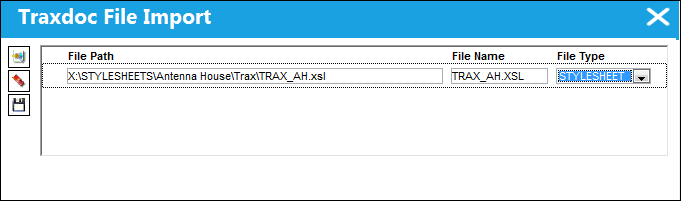
The Stylesheet will be populated in the File Path. Specify the File Type as 'STYLESHEET' and Save.
The Save prompt will appear. Select OK.
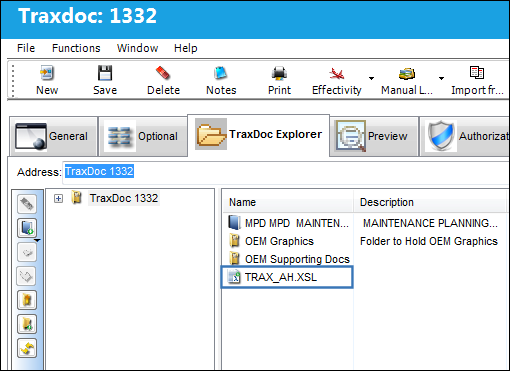
The Stylesheet has been loaded as seen below:
Importing MPT into the system:
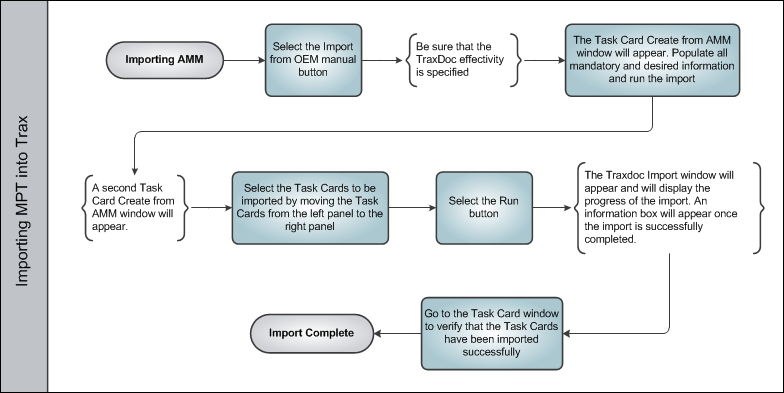
Once the SGML has been loaded successfully into TraxDoc, the user must import the manual into the system.
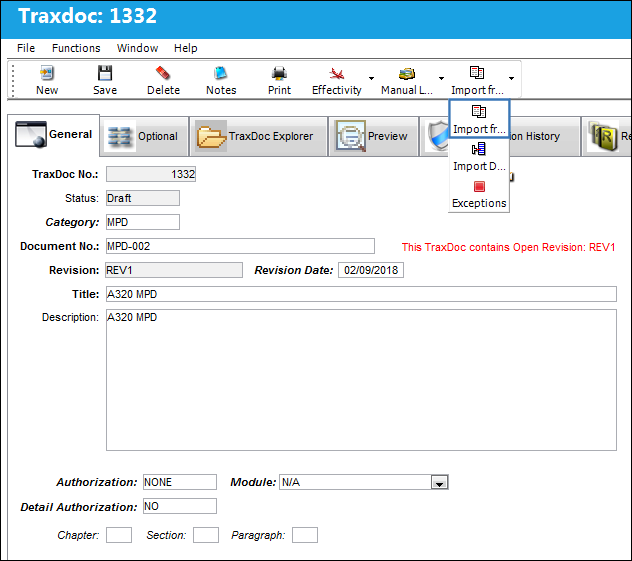
From the TraxDoc Document Detail, General tab, select the Import From OEM  button.
The Task Card Create from MPD window appears. Populate all mandatory and desired information and select the Next  button.
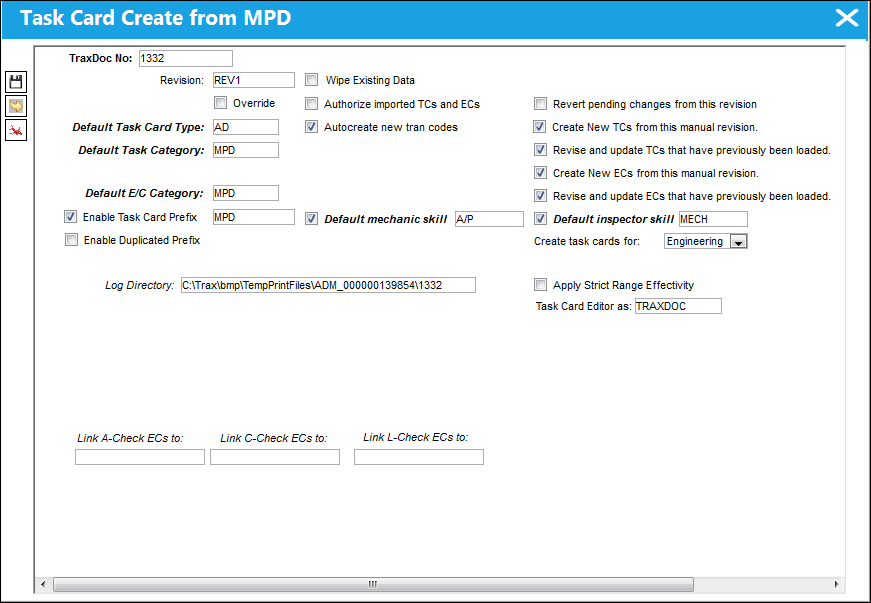
The following information/options are available in this window:
_____________________________________________________________________________________
TraxDoc No
The TraxDoc Document ID number, which is automatically generated by the system.
Revision
The document’s current revision number. Each TraxDoc can have multiple revisions as the data/records created through the TraxDoc will need to be updated (revised) regularly depending on the requirements of the aircraft manufacturer, regulatory agency, airline, etc.
Wipe Existing Data checkbox
Select this checkbox to replace the existing data with the data from the new revision.
 This checkbox is security controlled via TraxDoc/ Update/ TraxDoc Master/ Wipe Data on Update.
Override checkbox
Select this checkbox to override the Revision for Task Cards that are being imported.
Authorize Imported TCs and ECs checkbox
Select this checkbox to automatically authorize all Task Cards and ECs created.
Autocreate New Tran Codes checkbox
Some of the Task Card information provided in OEM manuals is controlled by Tran codes (i.e. Task Card types, areas, and skills). Selecting this checkbox will automatically create a Tran code record for any values found in the manual. If this box is not checked, the fields will still be set in the Task Card, but will have to be changed manually when working with the task card. This option is unchecked by default.
Default Task Card Type
The Task Card Type. This is useful in the sort and locating of the Task Card. This field will only appear when the Create New TCs from this Manual Revision checkbox is selected.
Default Task Category
Select the Task Card Category to be assigned to all Task Cards being created/revised from this import. Task Card Category will delegate the authorization process and send notifications as defined in the System Transaction Codes. This field will only appear when the Create New TCs from this Manual Revision checkbox is selected.
Default E/C Category
Select the E/C Category to be assigned to all Task Cards being created/revised from this import. The E/C Category will delegate the authorization process and send notifications as defined in the System Transaction Codes. This field will only appear when the Create New TCs from this Manual Revision checkbox is selected.
Enable Task Card Prefix checkbox
Select this checkbox to allow a prefix to be assigned to Task Cards being imported. This checkbox will only appear when the Create New ECs from this Manual Revision checkbox is selected.
Task Card Prefix - The prefix to be assigned to the T/C being imported.
Enable Duplicated Prefix checkbox
Select this checkbox to allow a duplicate prefix to be assigned to Task Cards being imported. This checkbox will only appear when the Enable Task Card Prefix checkbox is selected.
Duplicated Prefix - A duplicate of the prefix to be assigned to the T/C being imported.
Default Mechanic Skill checkbox
Select this checkbox if the mechanic skill is mandatory. The Default mechanic skill field will become mandatory once this checkbox is selected.
Default Mechanic Skill - The default mechanic skill for the Task Card items created if this is not supplied by the OEM manual.
Log Directory
This option allows the user to specify the directory to which log files and error reports will be saved. The initial value is a sub-folder inside the default temporary directory.
Revert Pending Changes from this Revision checkbox
Select this checkbox to revert pending changes to the revision. Any new Task Cards created for this revision will also be deleted.
Create New TCs from this Manual Revision checkbox
Select this checkbox to create new Task Cards from the current manual revision.
Revise and Update TCs that have Previously Been Loaded checkbox
Select this checkbox to revise and update Task Cards that have previously been loaded.
Create New ECs from this Manual Revision checkbox
Select this checkbox to create new Engineering Controls from the current manual revision.
Revise and Update ECs that have Previously Been Loaded checkbox
Select this checkbox to revise and update Engineering Controls that have previously been loaded.
Default Inspector Skill checkbox
Select this checkbox if the inspector skill is mandatory. The Default inspector skill field will become mandatory once this checkbox is selected.
Default Inspector Skill - The default inspector skill for the Task Card items created if this is not supplied by the OEM manual.
Create Task Cards For drop down
Select the module required to load the SGML Task Card to: Engineering, Shop, GSE.
Apply Strict Range Effectivity checkbox
When checked, imported Task Cards/Engineering Controls will be made effective to all Aircraft Type/Series, regardless of whether or not tail-level effectivity is specified in the manual. Positions, Zones, Panels, References, etc. will also be created for all type/series. If unchecked, effectivity will only be created for those type/series that have a least one effective Aircraft specified in the manual.
Task Card Editor As drop down
Select the editor type to create the format of the Task Card. The user may select from the following options:
- TRAXDOC
- TASKCARD
When the TASKCARD Editor is selected, the items of the Task Card will be generated in RTF.
Link A-Check ECs To
Certain E/Cs are specified in the manual as being part of an A-Check. This optional field allow the user to specify the E/C to which these manual E/Cs will be linked. By doing so, the user is assigning the manual E/Cs a parent E/C and employee the Engineering Control, Schedule Control Called On Functions. For additional information, please refer to the Engineering Control, Schedule Control Tab section of the Engineering Training Manual.
Link C-Check ECs To
Certain E/Cs are specified in the manual as being part of a C-Check. This optional field allow the user to specify the E/C to which these manual E/Cs will be linked. By doing so, the user is assigning the manual E/Cs a parent E/C and employee the Engineering Control, Schedule Control Called On Functions. For additional information, please refer to the Engineering Control, Schedule Control Tab section of the Engineering Training Manual.
Link L-Check ECs to:
Certain E/Cs are specified in the manual as being part of an L-Check. This optional field allow the user to specify the E/C to which these manual E/Cs will be linked. By doing so, the user is assigning the manual E/Cs a parent E/C and employee the Engineering Control, Schedule Control Called On Functions. For additional information, please refer to the Engineering Control, Schedule Control Tab section of the Engineering Training Manual.
_____________________________________________________________________________________
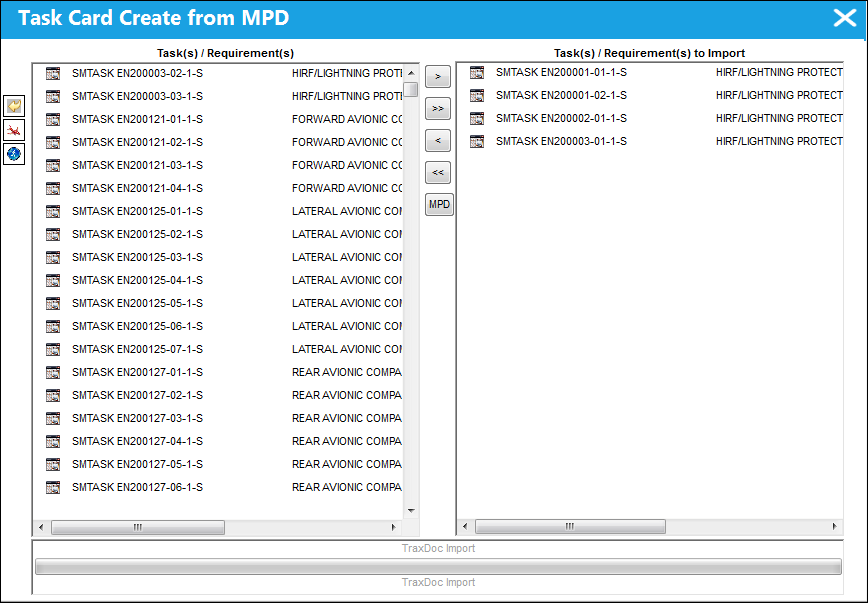
Trax displays the following window:
Select the Task Cards to be imported. Use the buttons in the middle to move the Task Cards from the Task(s)/Requirement(s) panel to the Task(s)/Requirement(s) to Import panel.
Once all desired Task Cards have been moved to the right panel, select the Run  button.
The Traxdoc Import window will appear displaying the progress of the import. Once the import is complete, the following information box will appear:
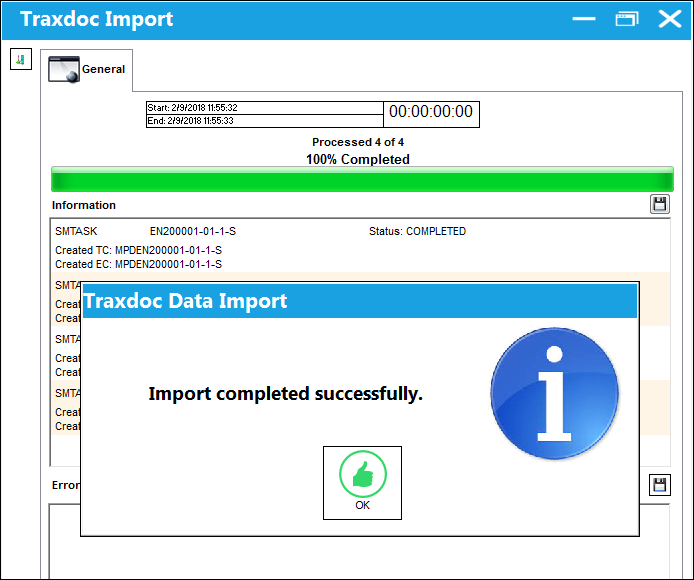
 If any errors occur during import, do not authorize any the the recently imported Task Cards. Contact TRAX immediately for assistance.
 Note: In TRAX Version 12.5 and all later releases, all applicable TraxDoc imports support five digit aircraft Manufacturer Serial Numbers (MSN), so long as TraxDoc switch AMMDESIGNATORTYPE is set to Yes.
Share
Print
|
©1997-2026 Trax USA Corp. All rights reserved. This manual may not be copied, photocopied, reproduced, translated, or converted to any electronic or machine-readable form, in whole or in part, without prior written approval from Trax USA Corp. |
 |