
 Share
Share
 Print
Print
|
|
|
|
|


Bin Transfers (Murata)
Through the Murata interface, users can perform Bin transfers from ASRS Bins to Non-ASRS Bins and vice-versa. ASRS Bins are part of an Automated Storage and Retrieval System such as the Murata Crane Manager (MCM). Bin Transfers can also be completed via the Murata interface (see below).
From the Bin Transfer window, when the MURATA switch is set to Yes and when the computer IP Address performing the transfer is configured in the Murata Configuration window, the following two buttons are be part of the Bin Transfer process: ASRS  button and Save to Retrieve Tray
  button.
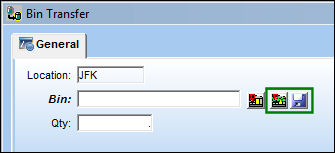
From a Non-ASRS Bin to an ASRS Bin:
When transferring a part from a Non-ASRS Bin to an ASRS Bin, the user does not choose which Bin to place the part in. Instead, the user specific information which the interface users to designate which Bin to transfer the part into.
The following part is in a Non-ASRS Bin. Select the Bin Transfer  button.
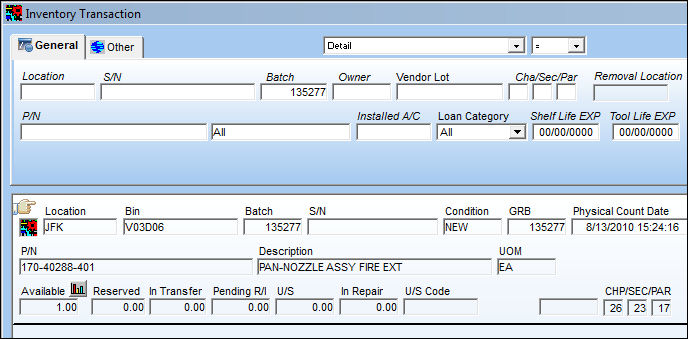
From the Bin Transfer window, select the ASRS button. Populate all of the fields then save.
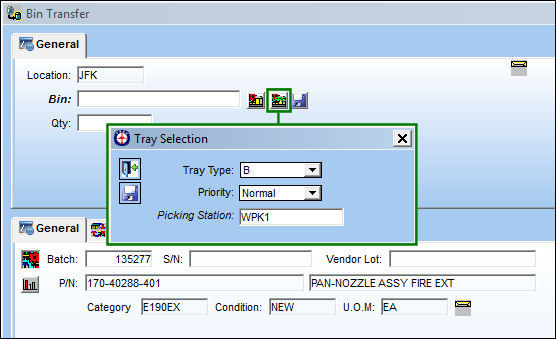
The following information/options are available in this window:
_____________________________________________________________________________________
Tray Type drop down
This field indicates the amount of Bins in the Tray. The size of the part will determine the size of the Bin needed to store said part. A Tray with fewer Bins means each Bin is larger while a Tray with many Bins means each Bin is smaller. Each letter corresponds to a number interval (i.e., A = 1, B = 8, C = 16, D = 24).
Priority drop down
The Priority designates where the request/Bin Transfer will set in the Murata Queue. The options are 'Normal' or 'High.' Selecting 'Normal' will place the request where it best fits in the queue (usually at the bottom), 'High' will place the request at the top of the queue. For more information refer to the Murata Queue.
Picking Station
The Picking Station where the user who will perform the request/Bin Transfer is located.
- This field is only available when Interface Switch
 MURATAMST is set to Yes. This allows users to choose between all available Picking Stations, not just the one associated to the IP Address in the Murata Configuration. When set to No, this field is not available.
_____________________________________________________________________________________
Once all fields in the Tray Selection prompt are populated, the Bin field is automatically populated by the Murata interface.
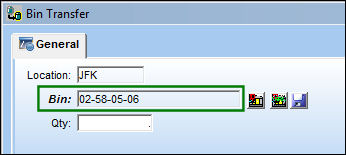
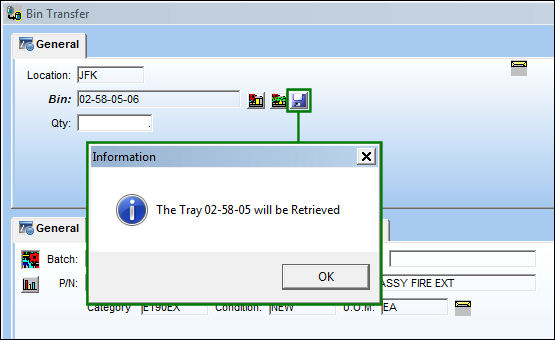
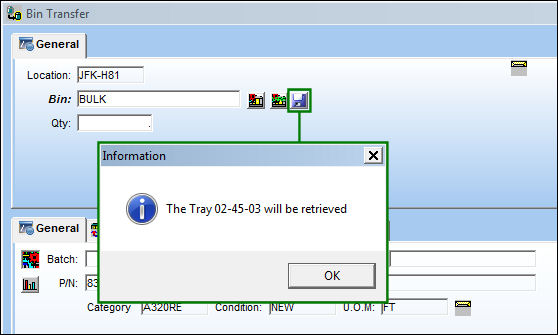
Once the Bin field if populated, select the Sent to Retrieve Tray button. The following prompt appears indicating the Tray that will be retrieved. The Bin is located in this Tray.
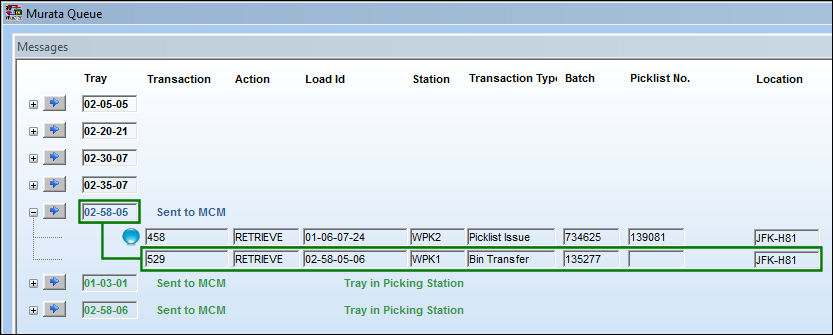
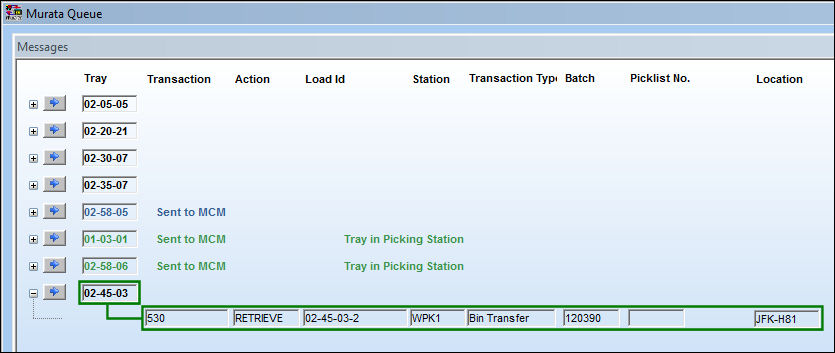
From the Murata Queue, notice that the request is sent to the queue. The MCM will then retrieve the Tray/Bin and the user will be able to place the part into this Tray/Bin.
From an ASRS Bin to a Non-ASRS Bin:
When transferring a part from an ASRS Bin to a Non-ASRS Bin, users do choose which Bin to transfer the part into (unlike in the above example). This type of Bin Transfer will remove a part from a Murata Tray/Bin into a regular Bin.
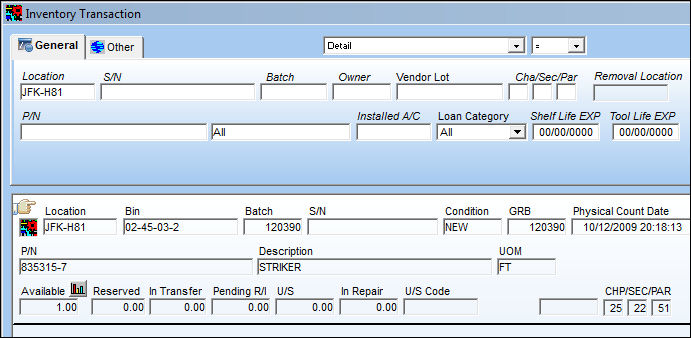
The following part is in an ASRS Bin. Select the Bin Transfer button.
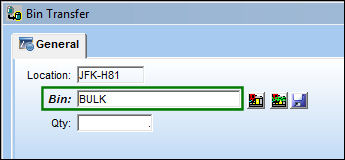
Enter a Non-ASRS Bin into the Bin field.
Select the ASRS button and populate both fields then save. The Tray Type field is not available because this field is only necessary for ASRS Bins.
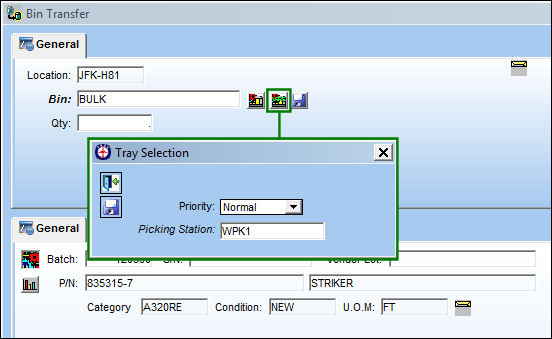
Once the Tray Selection prompt is saved, select the Sent to Retrieve Tray button. The following prompt appears indicating the Tray that will be retrieved. The Bin where the part is being transferred out of is located in this Tray.
From the Murata Queue, notice that the request is sent to the queue. The MCM will retrieve the Tray/Bin and the user can then remove the part from the Bin.
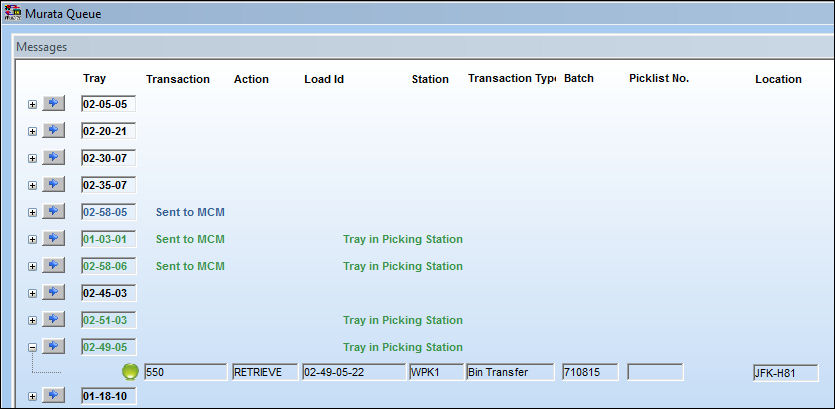
Completing an MCM Bin Transfer:
Once a Bin Transfer request is in the Murata Queue, users must wait for the Tray containing the required Bin to be delivered to the Picking Station. Once delivered, go to the Murata Multifunctional Screen by selecting into the transaction.
From the Murata Multifunctional Screen, the required Bin is highlighted in green. Select the Bin Transfer button.
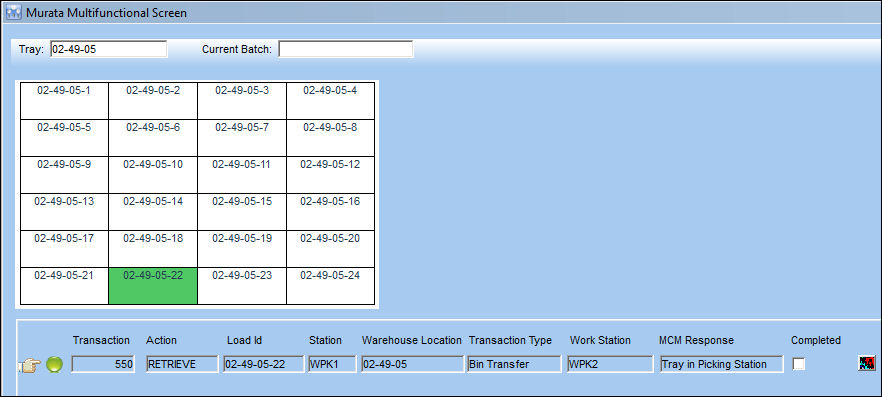
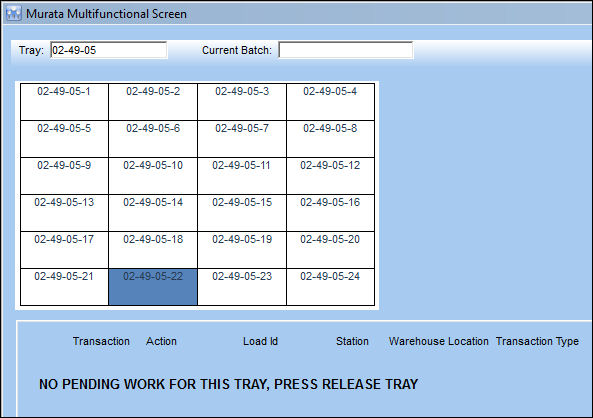
 The Bin containing the pending Murata request(s) will be highlighted in blue, Bins that contain a part are green, and empty Bins are white.
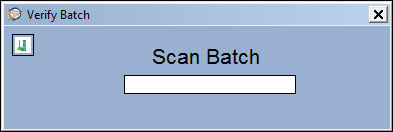
When selected, enter the Batch into the Verify Batch pop-up. The Batch can be entered manually or the Batch can be scanned with a hand-held scanner.
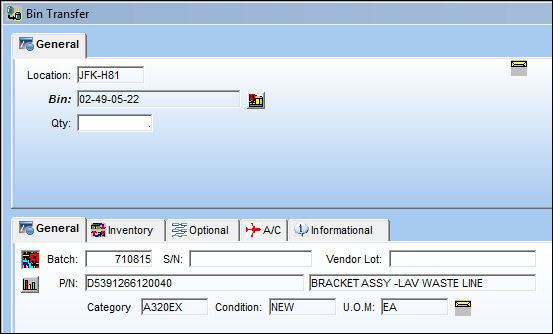
Users are sent directly to the Bin Transfer window where the information for the transfer, including Location and Bin, are listed. Enter the Quantity then save the window.
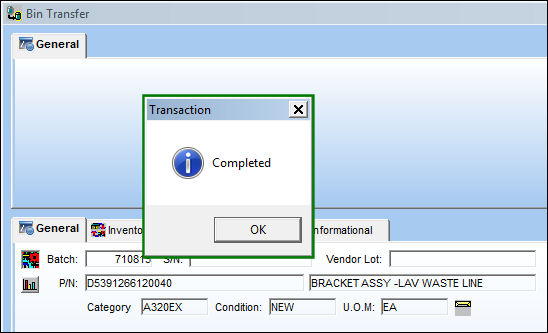
Once saved, the following prompt indicates that the transfer was completed.
From the Murata Multifunctional Screen, because the Bin Transfer has been completed, the transaction is removed. At this point, if there is no more work to be performed for the Tray (such as in the below example), the Tray can be sent back to the warehouse by selecting the Release Tray  button.
Share
Print
|
©1997-2026 Trax USA Corp. All rights reserved. This manual may not be copied, photocopied, reproduced, translated, or converted to any electronic or machine-readable form, in whole or in part, without prior written approval from Trax USA Corp. |
 |