
 Share
Share
 Print
Print
|
|
|
|
|


The Planning Query  button allows the user to query for maintenance items to be added to a Work Order. The results are displayed according to maintenance items that are coming due first or the soonest. The results continue to display in ascending order with the dates moving further into the future. The results will also be displayed based on the last planning query that was ran for that tail number. If a planning query was never ran for that specific tail number, the user must manually re-run the planning query.
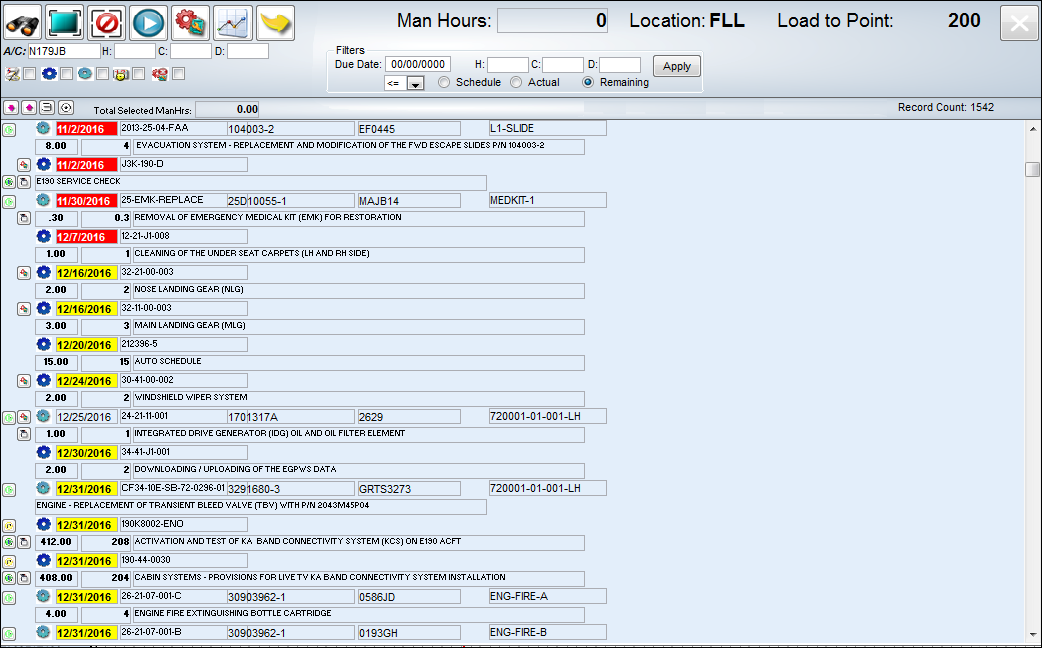
The following information/options are available in this window:
_____________________________________________________________________________________
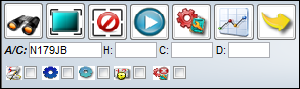
Find  button
Select this button once all search criteria has been selected to view the results of the planning query.
Select All  button
Click this button to select and highlight all of the maintenance events.
Deselect  button
Click this button to deselect any of the maintenance events.
Add Tasks  button
Select this button to add highlighted maintenance events to the Work Order.
Create W/O  button
Select this button to create a new Work Order. The Work Order will appear in the Planning Element Detail Area.
Planning Query  button
Select this button to run a planning query for the specific A/C in previous query without having to exit the current window.
Select  button
Select this button to view the details of any highlighted maintenance event.
A/C
The aircraft tail number.
Hours/Cycles/Days
Enter the Hours, Cycles or Days in which the maintenance events are coming due. Only one of the three options can be selected.
Planning Elements checkbox

Select the below checkboxes to filter by one or more of the following maintenance events:
 - Defect Planning Element
 - E/C Planning Element
 - P/N E/C Planning Element
 - P/N Control Planning Element
 - Show Tasks not in a W/O - Selecting this checkbox will show all tasks that are not associated to a W/O. When not selected, both tasks that are linked to W/Os and those not linked to W/Os will be displayed.
_____________________________________________________________________________________
The following information/options are available in this window:
_____________________________________________________________________________________
The user may apply one or more of the following filters to achieve more specific results when running the Planning query.

Due Date
Enter the due date of the maintenance event to filter by.
Hours/Cycles/Days
Enter the Hours, Cycles of Days which is controlling the task to filter by.
Logic drop down 
Select one of the following logic functions to filter for data:
<= Less than or equal to
= Equal to
Schedule radio button
Select the Schedule radio button to filter for tasks that are schedule driven.
Actual radio button
Select the Actual radio button to filter for tasks that are driven by actuals.
Remaining radio button
Select the Remaining radio button to filter for tasks that have remaining time.
Apply button
Select this button to apply the filters defined in this section.
_____________________________________________________________________________________
The following information/options are available in this window:
_____________________________________________________________________________________

Expand All  button
Select this button to display all maintenance events for a specific A/C.
Collapse All  button
Select this button to remove all maintenance events from being displayed.
Remove Task Grouping  button
Select the Remove Task Grouping button to have tasks grouped by date rather than by planning element.
Turn On Detail View  button
Select the Turn On Detail View button to filter and sort that data within the Planning Element Detail Area.
Note: The Filter/ Sort data that is saved via the Save Filter/Sort option can be viewed by selecting the Set Filter/Sort option. For more information on Filter/Sort options refer to the Filter Data and Sort Data sections System Standard Training Manual.
Total Selected ManHrs
The total number of Man Hours for selected events.
_____________________________________________________________________________________
The following information/options are available in this window:
_____________________________________________________________________________________
Part Status Indicator  button
Select this button to view information regarding part availability.
Part Number Availability button - The green button displays that all spares required are available in inventory.
Part Number Availability  button - The yellow button displays that some, but not all spares required are available in inventory.
Part Number Availability  button - The red button displays that no spares are available in inventory.
Tool Status Indicator  button
Tool Status Indicator  button - The green status button displays that all tools required are available in inventory.
Tool Status Indicator  button - The yellow status button displays that some, but not all tools are available in inventory.
Tool Status Indicator  button - The red status button displays that no tools are available in inventory.
Work Order  button
Illustrates that a Work Order is already assigned to the event. Select this button to view the Work Order associated to the planning event. For additional information, refer to Work Order via the Production Training Manual.
E/C Called On  button
TRAX displays the E/C Called On Planning window. All of the Called On E/Cs and related information are shown in this window.
For additional information regarding the set up of Called On E/Cs, refer to the E/C Called On Set Up via the Planning Training manual.
Due Date
The calculated due date of the item (rounded to the nearest date).
 - The Due Date field is highlighted in grey when it is not yet close to becoming due.
 - The Due Date field is highlighted in yellow when it is close to becoming due.
 - The Due Date field is highlighted in red when it is past due.
 - The letters of the Due Date are black with a red background when the EOM checkbox is selected against the item in the Engineering Control Schedule Tab.
Note: The Warning % determines when the Due Date is not yet close to being due (i.e 30 days), and when it is close to being due (i.e. 10 days).
For more information regarding the Due Date function, refer to the Due At section of this Manual.
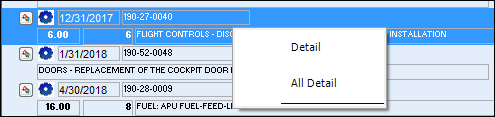
Detail/All Detail button
Select the Detail button to view the details of a specific maintenance event (once highlighted).
Select the All Detail button to view the details of all of the maintenance events.
_____________________________________________________________________________________
Share
Print
|
©1997-2026 Trax USA Corp. All rights reserved. This manual may not be copied, photocopied, reproduced, translated, or converted to any electronic or machine-readable form, in whole or in part, without prior written approval from Trax USA Corp. |
 |